
Winter camping: how to sleep warm and stay safe on snow
A winter night in camp is long, cold and quiet, and it rewards preparation more than any other kind of camping. On the shortest days of the year, at the latitude of Algonquin Park or Minneapolis, the sun is up for under nine hours, so you spend fifteen hours in the dark and most of them in your sleeping bag. Nothing about that is dangerous if your shelter is sound, your sleep system is built for the cold, your stove works and you keep your gear dry. Winter camping is the same skill as summer camping with three problems added: the long night, the moisture your own body puts into everything, and the fact that every drop of water has to be melted. Solve those three and you get empty campsites, no bugs, and some of the best nights you will ever spend outdoors.
This guide is for planned overnights on snow and in the cold, from a first night at a drive-in campground to a multi-day trip into the backcountry. It covers choosing a style of winter camping, planning around the dark, building a campsite on snow, tents and hot tents, snow shelters, the sleep system, the evening routine, stoves and fuel, making water, eating enough, the hazards particular to a winter camp, and what to do when something fails at 2 a.m. Getting to camp safely on snow and ice is covered in winter hiking: travelling safely on snow and ice, and the full detail of a warm sleep system in how to stay warm through a cold night. We point to both rather than repeat them.
The three problems winter adds
Most of what you know about camping still applies in winter. Pick a safe site, pitch well, keep your food away from animals, leave the place as you found it. What changes is the size of the margin. In July a wet sleeping bag means a bad night. In January it can mean a cold injury, and a stove that will not light can mean no drinking water. Winter adds three problems, and nearly every piece of advice in this guide exists to solve one of them.
The long night. On 21 December the sun is up for roughly 8.5 to 9 hours across the band from Maine to southern Ontario and Minnesota, and for about 7.5 hours at Edmonton. Camp chores that take an hour in summer take two in the cold, and anything you have not finished by dark you will be doing by headlamp with numb fingers. You will also be lying down for 12 to 14 hours, which is a long time to be cold if your sleep system is not up to it.
Moisture. Your body gives off water all day and all night, as sweat and as vapour in your breath. In summer it evaporates and disappears. In winter it condenses and freezes inside your jacket, your sleeping bag, your boots and the walls of your tent. Insulation that is wet or full of frost stops insulating. On one night this barely shows. Over three or four nights it is the single most common way a winter trip goes from comfortable to miserable.
Water. Streams freeze, lakes are under ice, and your bottles freeze if you let them. Unless you have open water nearby, everything you drink and cook with comes from snow melted on a stove, which is slow and uses far more fuel than boiling water does. Your stove stops being a convenience and becomes life-support equipment.
There are also good reasons not to go on a given weekend. A forecast of rain on snow, freezing rain, or temperatures hovering right around 32°F (0°C) makes for a wetter and more dangerous trip than a dry cold snap well below freezing, because wet is harder to manage than cold. A deep cold snap well below what your sleep system is rated for is also a reason to wait, or to choose a campsite near your car. Postponing is part of the skill.
Choosing your style: car camp, cabin, cold camp, or hot tent
Winter camping is not one activity. There are four quite different ways to do it, and the right one for your first trip is almost never the most ambitious.
Car camping at a winter campground. A growing number of state, provincial and national parks keep a campground open all winter, often with ploughed sites, a heated washroom and sometimes electrical hookups. Algonquin Provincial Park in Ontario, for example, runs its Mew Lake campground year-round with heated yurts and a comfort station. Your car is a few steps away, which means you can bring more insulation than you would ever carry, retreat to a warm vehicle if the night goes badly, and learn how your gear behaves in the cold with nothing at stake. This is the best first winter camping trip, and many people who have done years of winter backcountry trips still start each season this way to check their kit.
Yurts, cabins and huts. Heated or unheated roofed shelters, reached by car, ski or snowshoe, remove the shelter problem entirely and leave you to practise the rest: snow travel, cooking, water and managing moisture. Many are booked months ahead for winter weekends.
Cold camping. This is backpacking on snow: a tent or snow shelter, no heat source except your stove and your body, and everything carried on your back or pulled on a sled. It is light and it goes anywhere, and it is what most of this guide is about. It demands the most from your sleep system and your moisture management, because nothing will dry once it is wet.
Hot tenting. A canvas or synthetic wall tent with a small wood stove inside, usually hauled on a toboggan across frozen lakes and through flat forest. It is the traditional way of travelling in winter across much of northern Canada and the northern United States, and it is a different experience from cold camping: warm evenings, dry clothes, and a lot of wood cutting. It has its own section below.
Planning around the cold and the dark
Read the forecast for your camp, not the nearest town. Overnight lows in valley bottoms and beside frozen lakes are often much colder than the forecast for a town a few miles away, because cold, dense air drains downhill and pools at night. Look at the low, the wind, and whether any precipitation will fall as rain. Treat the forecast low as a starting point and plan for a colder night than it shows. See reading backcountry weather for how to adjust a valley forecast for elevation and terrain.
Plan the day backwards from sunset. Aim to arrive at camp with at least two hours of daylight left. Building a platform, pitching a tent, melting snow and cooking will use most of that. The winter arithmetic section of our winter hiking guide covers realistic travel speeds on snow, which are much slower than summer, particularly when you are breaking trail or pulling a sled.
Start short and close. Your first backcountry winter trip should be one night, a short distance from the trailhead, on a weekend with a forecast comfortably above the rating of your sleep system. Once you know how your gear, your body and your group behave in the cold, go farther and longer.
Leave a plan and carry a way to call for help. Tell someone where you are going, where you will camp, and when to call for help if they have not heard from you. Cell coverage in winter backcountry is unreliable, and phone batteries die fast in the cold. A satellite messenger or a personal locator beacon is worth carrying on any winter overnight away from a road. Our pre-trip safety plan has the full checklist.
Check the rules. Some parks close backcountry sites in winter, some require a permit even when no one is staffing the gate, and many restrict fires. Check before you go.
Choosing and building a campsite on snow
Everything in our campsite guide still applies. Winter adds a few priorities, and they matter more because the consequences of a poor site last all night.
Get out of the cold-air pool. A site a little way up a slope, or on a bench above a lake or valley floor, is often noticeably warmer than one at the very bottom. The flat shoreline of a frozen lake is inviting, and it is often the coldest and windiest place in the area.
Find shelter from the wind, and some morning sun. Wind strips heat from a tent and from you. A stand of trees, the lee of a ridge or a boulder does a lot of work. A site that catches the first sun will dry frost off your tent and warm you an hour before a site in the shade.
Look up and look uphill. Dead trees and branches loaded with snow come down, sometimes in the night. Do not camp under them. Do not camp in the runout of any slope steep enough to avalanche, or on a flat directly beneath one, because avalanches travel well past the bottom of the steep part. The avalanche section of our winter hiking guide explains what makes terrain dangerous. If you are not sure whether a slope above your site can slide, move.
Stay off the ice. Camping on a frozen lake is a real practice in the north, and some people do it deliberately on thick, well-known ice. Ice thickness varies, particularly near inlets, outlets, springs and shorelines with reeds, and a tent is a heavy, concentrated load you will not be watching all night. For most trips, camp on land beside the lake instead.
Build a platform. On deep, soft snow, a tent pitched straight on the surface will sag, lean, and leave you sleeping in a lumpy trough by morning. Instead:
- Stamp out a platform a little larger than your tent, wearing snowshoes or skis. Work in overlapping passes until the surface is uniform.
- Let it set. Disturbed snow bonds and hardens as it sits, a process called sintering. Give it twenty minutes to half an hour, longer in mild temperatures. This is a good time to melt your first pot of water.
- Stamp it again in boots to find soft spots, and level any dips before you pitch. A slight slope becomes very obvious over a fourteen-hour night.
- Dig a step into the vestibule in front of the door, if the snow is deep enough. You can sit in the doorway with your feet in the pit to put boots on, and cold air that pools in the hole stays out of the tent.
Set up zones. Pick one area for the kitchen, downwind of the tents. Pick one spot, well away from camp and away from any water, for urinating. Everyone should know which snow is clean for melting and which is not. It sounds obvious. On a dark night with a tired group it gets forgotten.
Tents in winter: snow load, anchors, and frost
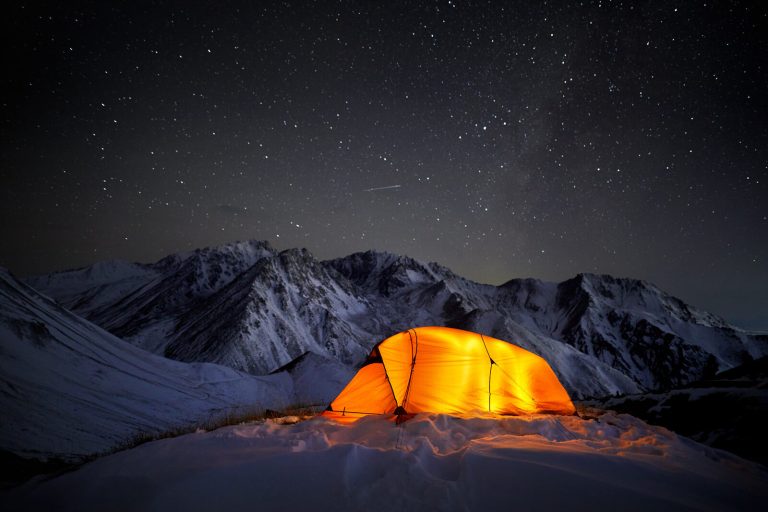
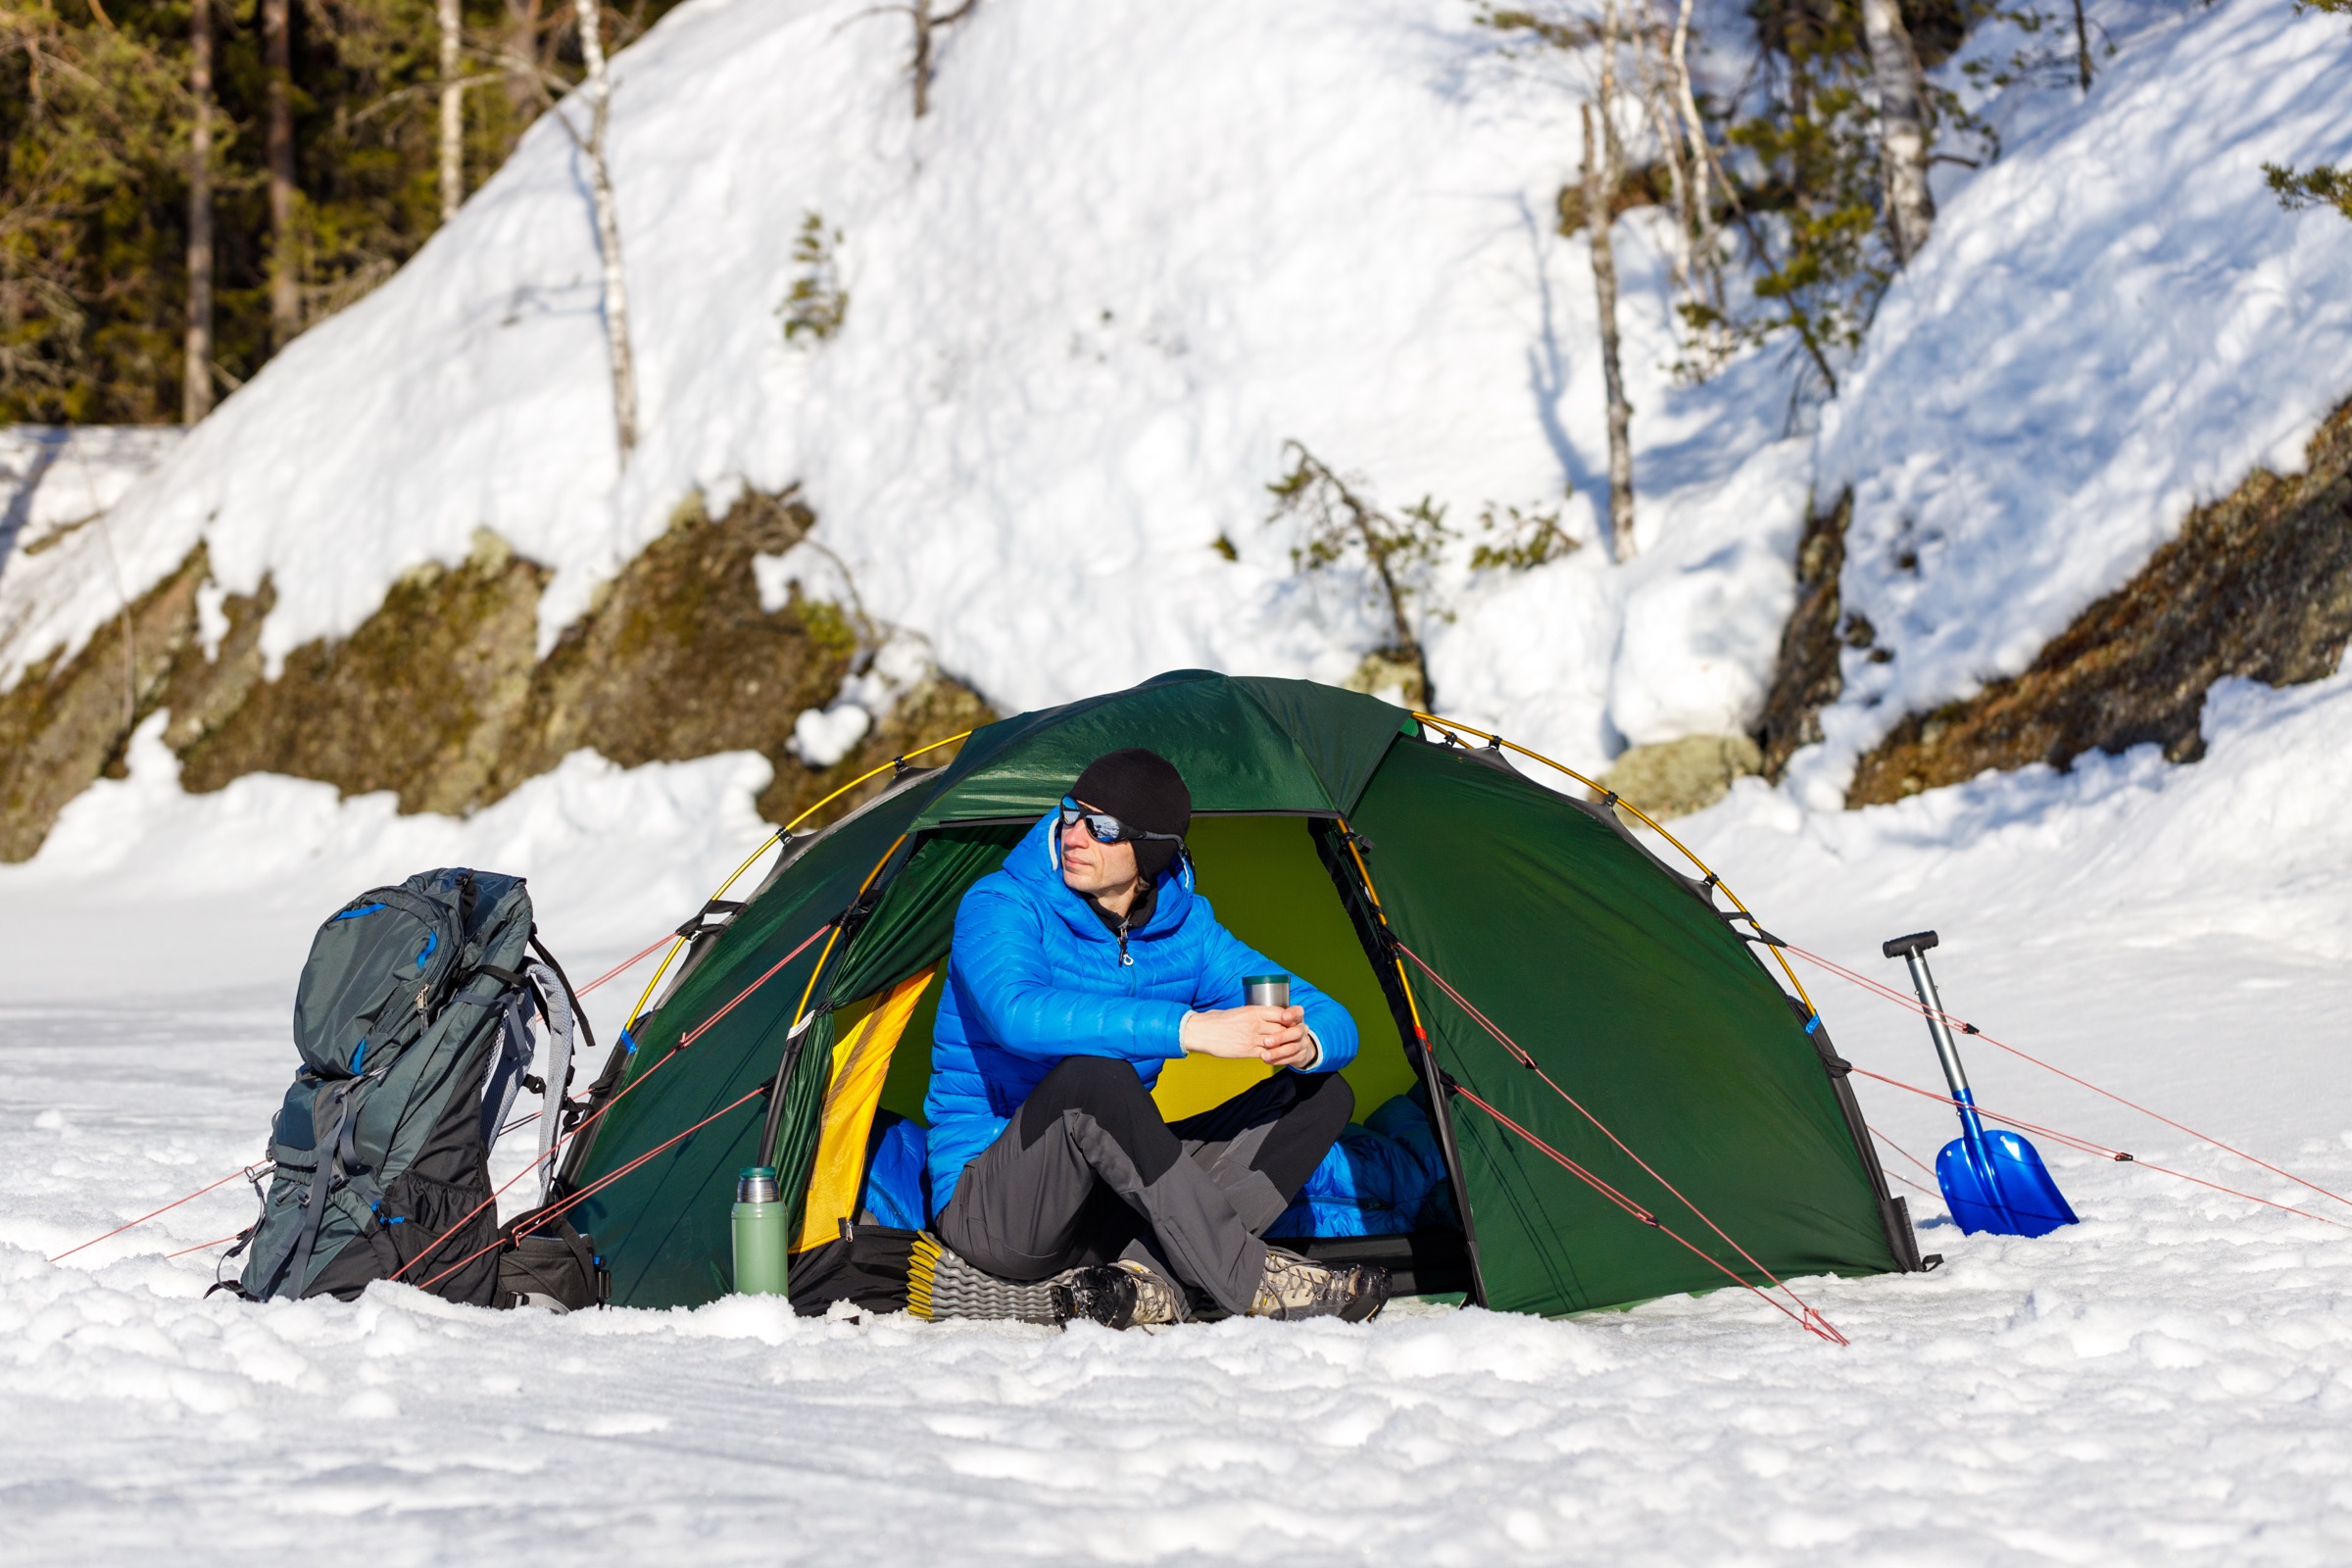
What kind of tent. A true four-season tent, such as the MSR Access 2, has stronger poles, steeper walls that shed snow, less mesh, and a fly that comes close to the ground to keep spindrift out. A sturdy three-season tent does fine below the treeline on a calm night with light snow. It is the wrong choice for exposed sites, heavy snowfall or high wind, where poles can break and mesh lets snow blow straight into the inner tent. Whatever you use, pitch it at home in the cold, with gloves on, before your trip.
Anchors. Ordinary summer stakes do not hold in snow. The options, in rough order of how well they work:
- Deadman anchors. Tie each guy line around a stick, a stuff sack filled with snow, or a purpose-made snow anchor. Bury it sideways, about 12 inches (30 cm) down, stamp the snow over it firmly, and let it set for a few minutes. It will be far stronger than any stake in soft snow. In the morning you may have to dig it out, so tie a line you can untie with cold hands, or accept that you will cut and replace a short loop.
- Snow stakes. Wide, flat stakes buried sideways or driven in at an angle. Better than summer stakes, not as strong as a buried deadman in deep powder.
- Skis, poles and snowshoes. Driven deep into the snow, they make solid anchors, as long as you do not need them before you break camp.
Snow load. Snow is heavy, and wet snow is very heavy. If it snows overnight, get up and knock it off the fly from the inside, or go out and brush it off, before it builds up enough to bend a pole or collapse the tent onto you. Keep snow from drifting over vents and doors, which blocks airflow.
Frost. Wake up after a cold night and the inside of your tent will be coated with frost from your own breath. When you move, it falls on your bag. Venting helps: open the vents, crack the door or vestibule if wind allows, and do not seal yourself in. Brush the frost off with a mitt or a small cloth before you pack, and never pack a frosted tent into a stuff sack next to your sleeping bag. If you can, shake out the fly and let the sun sublimate the frost before you leave.
Hot tenting: the northern tradition
Long before lightweight nylon tents, people travelled and lived through northern winters in canvas tents heated by small wood stoves. Hot tenting is still very much alive, particularly across Canada’s boreal forest and the northern United States, and it is worth understanding even if you never do it, because it solves the three winter problems in a completely different way.
How it works. The tent is a canvas or a heavy synthetic wall tent with a fireproof collar, called a stove jack, sewn into the roof or wall. A small sheet-metal stove sits inside, and its pipe exits through the jack. With the stove going, the inside of the tent can be well above freezing while it is far below outside. Wet clothes dry overnight, snow melts in a pot on the stovetop, and evenings are spent in shirtsleeves. When the stove dies down, the tent cools quickly, so hot tenters still carry winter sleeping bags.
What it costs you. Weight and work. A wall tent, stove and pipe are far too heavy to carry on your back, so the gear goes on a long toboggan pulled over flat, frozen terrain: lakes, rivers, and portages. That confines hot tenting to country where you can drag a load. You will also need a lot of dry wood, which means standing dead trees, a bow saw or a good folding saw, and an axe for splitting, plus the skill to use both safely with cold hands.
The rules hot tenters live by.
- Use a tent and stove made to work together, with a proper stove jack. Never improvise a stove inside a nylon tent.
- Keep a clear space around the stove. Sleeping bags, clothing and tent walls stay well back from it.
- Fit a spark arrestor to the top of the pipe and pitch well away from overhanging branches.
- Carry a battery-powered carbon monoxide alarm and put it where you sleep. A stove that is damped down for the night burns slowly and poorly, which is exactly when it produces the most carbon monoxide.
- Check local fire rules. Many parks that allow hot tents require a permit or restrict where wood can be cut, and some prohibit cutting live or standing trees entirely.
If this appeals to you, a guided or outfitted weekend is the best introduction. Outfitters around Algonquin Park and elsewhere run exactly that, and the learning curve on stove management is steep.
Quinzhees and snow trenches
Snow is an excellent insulator. A well-built snow shelter holds at close to freezing inside even on a night far colder than that outside, is silent in a storm, and cannot blow away. Snow shelters are slow and wet to build, though, and building one takes hours and a lot of sweat. Most winter campers use them as a deliberate experience or a backup, not as their main shelter. For an unplanned night out with no tent, see how to build an emergency shelter.
A quinzhee is a dome made by piling snow into a mound, letting it set, and hollowing it out. It works with almost any snow, including the soft, unconsolidated snow that is useless for cutting blocks.
- Stamp out a circle about 8 to 10 feet (2.5 to 3 m) across for a two-person shelter.
- Pile snow into a mound about 6 to 7 feet (1.8 to 2 m) high, mixing snow from different layers as you go. Uniform mixing helps it set evenly.
- Let it sinter. Leave the mound for at least an hour and a half, and two to three hours if you have the time. Mild temperatures need the longer wait. Digging out a mound that has not set is how quinzhees collapse.
- Push depth gauges in. Push a couple of dozen sticks, each about a foot (30 cm) long, into the mound all over its surface, straight in toward the centre, leaving a little showing.
- Dig the entrance on the downwind side, low, so the doorway sits below the level of the sleeping floor. Cold air sinks and stays in the entrance.
- Hollow it out from the inside, working upward and outward, until you reach the end of each stick. That gives walls about 10 to 12 inches (25 to 30 cm) thick. Smooth the ceiling so meltwater runs down the walls instead of dripping.
- Punch ventilation holes. Make at least one fist-sized hole through the upper wall, and keep it clear all night.
A snow trench is faster, and it works on its own or as an emergency option. Dig a trench a little longer and wider than your body and 3 to 4 feet (0.9 to 1.2 m) deep in firm snow. Roof it with your tent fly, a tarp, skis and poles covered in snow blocks, or cut blocks leaned together into an A-frame. It takes much less time than a quinzhee, and it is noticeably colder.
Snow shelters can suffocate and collapse
Keep a ventilation hole open all night and check it after snowfall. Never run a stove, candle or heater in a sealed snow shelter, because carbon monoxide and a lack of fresh air can build up without warning. Keep a shovel inside with you. Mark the entrance and the outline of the shelter on the surface with poles or skis, so no one walks on the roof or loses the entrance in a storm. Do not build a snow shelter alone, and do not sleep in one when temperatures are climbing toward freezing, when the roof is most likely to sag and collapse.
The sleep system for snow
Your sleep system is the core of a winter trip. Our guide to staying warm through a cold night covers it in detail. On snow, three points matter more than any other.
Insulation beneath you comes first. Snow draws heat out of you through the pad all night, and your sleeping bag does very little underneath you, because your weight crushes its insulation flat. A pad’s warmth is measured as its R-value, under a standard industry test (ASTM F3340) adopted in 2020, so R-values from different brands can be compared. For sleeping on snow, a combined R-value of about 5 is a common starting point, and more is better on very cold nights. R-values add up when you stack pads. The classic winter combination is a closed-cell foam pad, such as the Therm-a-Rest Z Lite Sol, underneath an insulated air pad, such as the Therm-a-Rest NeoAir XTherm. The foam pad protects the air pad from punctures, and if the air pad fails in the night, the foam still keeps you off the snow.
Read the bag’s temperature rating correctly. Bags tested under the international standard ISO 23537 carry two useful numbers. The comfort rating is the temperature at which an average woman can sleep comfortably in a relaxed position. The limit rating is the temperature at which an average man can sleep curled up for eight hours without waking from cold. The third number, extreme, is a survival figure, not a sleeping figure. Ignore it when you buy. The tests are done on a well-insulated pad, so a bag on a thin pad on snow will feel much colder than its rating. If you sleep cold, buy by the comfort rating. For winter, choose a bag whose comfort or limit rating is at or below the coldest night you realistically expect, not the average one.
You can add warmth to a bag, but not insulation beneath you. An insulated jacket worn in the bag, or draped over it, adds several degrees of warmth. A liner adds a little more. A second bag over the first works well at a car campsite. None of these fix a pad that is too thin, so start there.
For nights of extreme cold on long trips, some winter travellers also use a vapour barrier liner, a thin waterproof sack worn inside the sleeping bag. It stops the moisture from your body reaching the bag’s insulation, where it would freeze. It feels clammy, and it is not needed on a weekend trip, but on trips of a week or more in deep, dry cold it can keep a down bag from slowly filling with ice.
The long night: from arrival to morning
A good winter night is mostly a routine. Do these things in roughly this order and you will stay warmer, sleep better, and get out of camp faster in the morning.
When you arrive.
- Put on your insulated jacket immediately, before you start any chores and before you feel cold. You will have been sweating on the way in, and you will cool quickly the moment you stop moving. If your base layer is soaked, change into a dry one first, then put the jacket on.
- Start melting snow while other people pitch tents and stamp out platforms.
- Change into dry camp socks, and into insulated booties or loosened boots with dry liners if you have them.
- Lay out your sleep system early, so your pads are inflated and your sleeping bag lofts before you get into it.
Before bed.
- Eat a hot dinner, then a fatty snack just before you get into your bag. Your body burns it slowly through the night.
- Drink something warm, and top up. Going to bed dehydrated makes you colder.
- Fill a bottle with hot water for your sleeping bag. Hot, not boiling, with the lid tightened properly and tested. A Nalgene wide-mouth handles it well. Put it at your core or between your thighs, not only at your feet, and you will have unfrozen water in the morning.
- Fill an insulated bottle with hot water or a hot drink for the morning, so you can have something warm before you light the stove.
- Warm up before you get in. A few minutes of brisk activity, such as squats or a quick walk, gets you into the bag warm. A sleeping bag holds heat. It does not make it.
- Urinate right before bed, even if you do not feel you need to.
What goes in the bag with you. Anything that must not freeze: your water bottles, your phone and batteries, your headlamp, your boot liners if your boots have them, the stove fuel canister if you are using one, a water filter if you carried one (freezing can damage a filter without any visible sign), and tomorrow’s base layer or gloves if you want them warm. Put the damp items in a thin stuff sack so they do not wet the bag’s lining.
Boots. Frozen boots are hard to get on and slow to warm. Put boot liners in your sleeping bag. Put the boot shells in a stuff sack, then in the vestibule or under the foot of your pad. Loosen the laces fully before you take them off, because frozen laces do not loosen in the morning.
A pee bottle. Leaving a warm bag and getting dressed to go outside at 2 a.m. costs a lot of heat and a lot of sleep. Most experienced winter campers carry a dedicated, wide-mouthed bottle, clearly marked and a different shape or colour from any water bottle, and many women use a funnel-style urination device with it. Empty it outside first thing in the morning, in your designated spot.
If you wake up cold. Eat something. Put on any layers you are not wearing. Check that the hood of your bag is closed around your face so only your nose and mouth are exposed. Clench and release your big muscles. Refill the hot water bottle if you have fuel and a way to do it safely. Do not breathe inside the bag, however tempting: the moisture in your breath goes straight into the insulation.
In the morning. Light the stove for a hot drink before you get fully out of the bag if you can do it safely in the vestibule with the door open. Get dressed inside the bag. Knock the frost off the tent walls before it falls on everything, and pack your sleeping bag last, into its dry bag, before you start packing up anything wet.
Moisture: the slow way winter trips fail
On a single night, moisture is a nuisance. On a trip of several days, it is the thing most likely to end it. Every piece of insulation you own is slowly taking on water from your body, and in cold that stays below freezing, almost nothing dries.
Do not sweat on the way in. Start moving slightly cold, and take off layers before you start to sweat, not after. The staying dry section of our winter hiking guide covers venting and layering on the move, and our clothing guide covers fabrics.
Keep your sleeping insulation separate. Your sleeping bag and your insulated jacket are your most important insulation. Pack them in waterproof bags, such as a roll-top dry bag, and never stuff wet clothing in with them.
Use your body heat to dry small things. Damp socks, gloves and liners dry overnight inside your sleeping bag, or inside your jacket during the day, but only if you have the warmth to spare. Do not try to dry a soaking layer this way. It just moves the water into your sleeping bag.
Air your sleeping bag. When the sun is out, open the bag and drape it over the tent for half an hour at midday on a layover day. Frost in the insulation will sublimate off in dry, sunny air even below freezing.
Watch the loft. A down bag that looks flatter each morning is taking on water. If it has lost noticeable loft, plan to shorten the trip or get to a heated shelter, rather than push on and discover how little warmth it has left on the coldest night.
Stoves and fuel in the cold
In winter your stove makes your water. A stove that fails is not a meal problem, it is a hydration problem, so choose it for the cold and practise with it at home first.
Canister stoves. Canisters contain a mix of gases that must boil inside the canister to reach the burner. Pure butane stops vaporizing at about 31°F (−1°C), isobutane at about 11°F (−12°C) and propane at about −44°F (−42°C). Winter blends contain more isobutane and propane for that reason. In practice, a canister stove fades well before the air reaches those temperatures, because the fuel cools the canister as it vaporizes. A stove with a pressure regulator, such as the MSR WindBurner, holds its output better as the canister cools. To get the most from a canister stove in winter:
- Keep the canister warm. Sleep with it, and carry it inside your jacket before cooking.
- Stand it on a square of closed-cell foam or a thin piece of wood, never directly on snow.
- Carry a spare canister, and swap a cold, half-empty canister for a warm one, which will run much better.
- Shield the flame from wind, but never wrap a windscreen tightly around an upright canister, where it can overheat.
Liquid-fuel stoves. Stoves that burn white gas work reliably in deep cold, which is why they have been the standard for long winter and expedition trips. You pump the fuel bottle to pressurize it and prime the stove before lighting. They are heavier, noisier and need more care, and they work where canisters do not. Some remote-canister stoves can also be run with the canister turned upside down, which feeds liquid fuel to the burner and gives much better cold performance. Only do this with a stove built for it.
Cold fuel freezes skin
Liquid fuel at air temperature in deep cold can cause frostbite almost instantly if it spills on bare skin, because it evaporates so fast. Fill and pump stoves wearing thin gloves, and spill-proof your bottles. See frostbite, frostnip and trench foot for treating cold injury.
Plan for far more fuel than in summer. Melting snow uses much more energy than boiling water, and you will be melting all your drinking water as well as cooking. How much more depends on your stove, the snow, the wind and the temperature, so the only reliable number is the one you get by testing your own stove in cold conditions before a trip. Carry a margin on top of that.
Where to cook. Outside, in a kitchen area, is safest. In a storm, many winter campers cook in the tent vestibule. If you do, cook with the vestibule door open, with the stove as far from the inner tent as you can place it, never in the inner tent itself, and never while anyone is asleep. Know that this is a real risk you are choosing, and see the carbon monoxide warning below.
Water from snow
Use open water if you can. If there is safe open water nearby, such as a flowing stream, collecting it saves a great deal of fuel. Treat it as you would in summer. See how to purify water in the backcountry, and note that a water filter which has been used must be kept from freezing, which means sleeping with it. Never walk onto ice to reach open water, and be careful at stream edges where snow can hide an undercut bank.
How to melt snow efficiently.
- Start with a little liquid water in the bottom of the pot, from your bottle. A pot of dry snow on a stove can scorch the pot and give the water a burnt taste, and it melts more slowly.
- Add snow gradually as it melts, rather than packing the pot full.
- Use dense snow or ice if you can find it. Fluffy new snow is mostly air and melts down to very little water, so you need a huge volume. Old, settled or wind-packed snow, or chunks of ice, give far more water for the same effort.
- Keep a lid on, and shelter the stove from wind.
- Collect clean snow from your designated clean area, away from the latrine, urine spot and where anyone has walked.
Is melted snow safe? Fresh snow collected well away from camp, trails and animal activity is generally low risk. Snow near popular campsites, trails, or anywhere animals or people have been is not. If in doubt, bring it to a boil, which also gives you hot water for drinks and bottles.
Keep your water liquid. Carry bottles in insulated sleeves, or in your pack wrapped in clothing, and store them upside down. Water freezes from the top down, so ice forms at what is now the bottom of the bottle rather than sealing the lid. Hydration reservoirs and their hoses freeze quickly in winter. Bottles are more reliable. Fill bottles with hot water in the morning and they will stay liquid much longer. Our winter hiking guide has more on carrying water on the move.
Drink on a schedule. Cold suppresses thirst, and dry winter air, heavy breathing and the effort of snow travel all increase your losses. Dehydration makes you colder and more prone to cold injury. Drink at every stop, and have a hot drink with every meal.
Eating to stay warm
Your body burns much more energy in winter, both keeping warm and moving through snow. Our guide to what food to bring covers planning in detail. For winter, a few things change.
Choose food for its energy and its ease. Fat carries more than twice the energy per gram that carbohydrate does, so butter, cheese, nuts, nut butter, salami and chocolate earn their weight. Pair them with fast carbohydrates for energy on the move.
Plan for food that freezes. Energy bars, cheese and chocolate turn hard as rock in deep cold and can crack teeth. Keep the day’s snacks in an inside jacket pocket, cut hard foods into bite-sized pieces at home, and choose snacks that are still chewable when cold. Test them in your freezer before the trip.
Keep cooking simple. One-pot meals that only need boiling water, eaten from the pot or from an insulated mug, keep stove time and washing to a minimum. Washing dishes in the cold is miserable, and spilled food and greywater freeze into the snow around camp.
Eat before you sleep and when you wake. A snack before bed and something within reach in the night give your body fuel to generate heat. Alcohol feels warming and does the opposite, opening blood vessels in the skin and increasing heat loss. Save it for the car.
Hazards around a winter camp
Carbon monoxide gives no warning
Carbon monoxide has no colour or smell, and the first symptoms, which are headache, dizziness, nausea and drowsiness, feel like altitude, dehydration or simply being tired. Any stove, lantern, candle or heater that burns fuel produces it, and a tent, vestibule or snow shelter that has been sealed against the cold lets it build up. Never sleep with a stove, heater or candle burning in an enclosed space. If anyone in the tent develops a headache, nausea or confusion while a stove is running, turn it off, get everyone into fresh air, and seek medical help. Carry a small battery-powered carbon monoxide alarm if you cook in a vestibule or use a hot tent.
Hypothermia and frostbite. In camp, when you have stopped moving, sweat-damp clothing and long periods standing still are the main risks. Watch each other for the early signs: shivering, fumbling, poor decisions and withdrawal. Our guides to recognizing and treating hypothermia and frostbite and cold injury cover what to do. Toes are most at risk in the evening and fingers during chores such as pitching tents and handling metal, stoves and fuel.
Avalanche runouts, dead trees and tree wells. Covered under campsite choice above. Deep, soft snow around the base of conifers can also hide a tree well, a hollow that can trap anyone who falls in head first, so keep children and dogs close.
Ice. Lakes and rivers are the easiest travel routes in the north and some of the most dangerous. Ice thickness varies across a single lake, and moving water, springs, inlets and outlets keep it thin. Our winter hiking guide covers travel on frozen lakes and creeks, and surviving cold-water immersion and falling through ice covers what to do if it breaks.
Fire. A campfire on deep snow melts downward and puts itself out. Build it on a platform of green logs or on bare ground you have cleared. Keep it well away from overhanging branches loaded with snow, which can drop and put it out, and check whether fires are allowed. See how to start a fire in any conditions.
Wildlife. Many bears are dormant through mid-winter, but not all of them, and not in every region or in the shoulder seasons. Foxes, ravens, rodents and martens are active all winter and will raid unprotected food. Store food as you would in summer. See how to protect your food and camp from animals.
When something fails in the night
Winter camping gear fails in predictable ways. The fix is usually simple if you have thought about it before, and difficult if you have not.
Your air pad goes flat. This is why you carry a foam pad underneath. Put everything else you have underneath you too, such as your pack, spare clothing and a rope. Find and patch the leak in the morning, with warm hands, rather than in the dark.
You are too cold to sleep. Eat, put on every layer, refill a hot water bottle, and share warmth with a tent partner if you can. If it is not getting better and you are shivering hard, treat it as early hypothermia. Get the stove going for hot drinks, get into a sleeping bag with a warm partner, and plan to leave at first light.
The stove will not work. Warm the canister inside your jacket. Swap it for a warm one. Clean the jet or fuel line if it is a liquid-fuel stove. If it still fails, ration the water in your insulated bottles, avoid eating snow, which costs body heat you cannot spare, and head out in the morning. This is why a group carries more than one stove on a longer trip.
The tent breaks or blows down. Get into your sleeping bag inside the collapsed tent, which still blocks wind and snow, and wait for daylight. If it is unusable, get into an emergency bivvy or dig a trench, and roof it with the tent fly.
Your sleeping bag gets wet. This is serious. Get into dry clothing, including your insulated jacket, and use your partner’s warmth. A wet synthetic bag still gives some warmth. A soaked down bag gives very little. Plan to leave in the morning.
When to call for help. If someone in your group is hypothermic and not responding to warming, has a serious injury or suspected carbon monoxide poisoning, or you cannot safely get out, use your satellite messenger or beacon. See how to signal for rescue. It is always better to call early in winter, because rescues take longer and the night is long.
Leave No Trace on snow
Snow hides everything until the spring melt, when it all reappears at once. The seven Leave No Trace principles apply as usual, with a few winter adjustments.
- Camp on snow or durable ground, at least 200 feet (60 m) from lakes, streams, and trails, even when they are frozen and buried.
- Human waste. A cathole in snow only hides waste until it melts. Where you cannot dig into soil because the ground is frozen or the snow is too deep, pack solid waste out in a waste bag. See human waste in the backcountry for how.
- Urinate away from camp and water, in one designated spot, and away from where anyone will collect snow.
- Pack out all food scraps and strain greywater. Spilled food frozen into the snow will be there, and attracting animals, in spring.
- Fill in or flatten quinzhees, trenches and deep platforms where people or snow machines could fall in, and dismantle wind walls when you leave.
- Collect only dead and down wood for fires, unless you have a hot tenting permit that says otherwise, and do not cut live trees.
Common mistakes
- Arriving at camp too late. Chores take twice as long in the cold, and doing them by headlamp costs more heat and patience.
- Stopping to set up camp before putting on the warm jacket. By the time you feel cold, you have already lost the heat, and you will spend an hour getting it back.
- Relying on a sleeping bag to make up for a thin pad. On snow, the pad is the foundation. Start with the pad.
- Taking the bag rating at face value. Use the comfort rating if you sleep cold, and remember the test assumed a good pad.
- Letting the water bottles, fuel canister, phone or boot liners freeze overnight.
- Not enough fuel, because snow melting was planned like summer cooking.
- Breathing into the sleeping bag to warm up, which fills the insulation with moisture.
- Packing a frosted tent next to the sleeping bag.
- Running a stove in a closed tent or snow shelter.
- Going too far on the first trip. The first winter night is best spent close to the car or a warm shelter.
What to carry
Everything in the Ten Essentials still applies, plus the winter travel gear in our winter hiking kit list, such as traction, snowshoes or the traditional wood-frame kind, and gaiters. For an overnight, add:
Shelter
- A four-season tent for exposed or snowy sites, such as the MSR Access 2, or a sturdy three-season tent for sheltered sites and mild nights.
- Snow anchors, or stuff sacks to use as deadman anchors.
- A snow shovel, for platforms, kitchens, anchors and emergency shelters. A lightweight avalanche shovel works well in snow. A folding entrenching tool works for a car camp but is slow in deep snow.
- An emergency bivvy as backup.
Sleep
- A closed-cell foam pad, such as the Z Lite Sol, under an insulated air pad, such as the NeoAir XTherm, for a combined R-value of about 5 or more.
- A sleeping bag whose comfort or limit rating is at or below the coldest night you expect.
- A dry bag for the sleeping bag, such as a roll-top dry bag.
- A clearly marked pee bottle.
Clothing
- A warm insulated jacket for camp, sized to fit over your other layers. The Ghost Whisperer in men’s or women’s is light, and the synthetic Columbia Powder Lite in men’s or women’s keeps some warmth when damp.
- A dry base layer for sleeping, such as the Smartwool Merino 250 in men’s or women’s, kept only for camp.
- Dry camp socks, such as the Darn Tough Light Hiker in men’s or women’s, plus insulated booties if you have them.
- Insulated boots, such as the Oboz Bridger Insulated, or boots with removable liners.
- Warm mitts, spare gloves, a warm hat and a neck gaiter or balaclava.
Kitchen and water
- A stove suited to the cold, such as the regulated MSR WindBurner, or a liquid-fuel stove for deep cold, plus plenty of fuel.
- A square of foam to insulate the stove from the snow.
- Two ways to light it, such as a lighter kept warm in a pocket and stormproof matches.
- A wide-mouth water bottle for hot water at night, in an insulated sleeve, and an insulated bottle for hot drinks.
- High-energy food that stays chewable in the cold.
Safety
- A battery-powered carbon monoxide alarm if you will cook in a vestibule or use a hot tent.
- A headlamp for each person, with lithium batteries or a spare charge kept warm, and a power bank in your sleeping bag.
- Chemical hand warmers.
- A first-aid kit with blister supplies.
- A satellite messenger or personal locator beacon, and a trip plan left with someone at home.
Plan your winter camping trip with the Trip Planner
Key takeaways
Winter camping is ordinary camping with three problems added: a very long night, moisture that freezes into everything, and water that has to be melted. Choose a style you are ready for, and make your first trip a single night near your car or a heated shelter. Plan the day backwards from sunset and arrive with two hours of daylight to spare. Pick a site out of cold-air pools, avalanche runouts and the reach of dead, snow-loaded trees, stamp out a platform and let it set, and anchor your tent with buried deadman anchors. Build your sleep system from the ground up, with a foam pad under an insulated air pad for a combined R-value of about 5 or more, and a bag rated for the coldest night you expect, read by its comfort or limit rating. Put your warm jacket on the moment you arrive, eat and drink before bed, and sleep with a hot water bottle and anything that must not freeze. Keep moisture out of your insulation above all else, because it is the slow way winter trips fail. Choose a stove that works in the cold, keep the fuel warm, start melting snow with a little water in the pot, and carry more fuel than you think you need. Never sleep with a stove, heater or candle running in an enclosed space. Pack out what the snow would otherwise hide. And when the forecast turns wet or colder than your gear, remember that postponing is part of the skill.
Canister fuel boiling points follow published manufacturer and fuel-chemistry figures. Sleeping bag temperature ratings follow the international standard ISO 23537, and sleeping pad R-values the ASTM F3340 test standard adopted across the outdoor industry in 2020. Quinzhee construction follows guidance published by the Washington Trails Association, and winter waste and campsite distances follow Leave No Trace Center for Outdoor Ethics guidance. Daylight figures are calculated for 21 December. This is general education and not a substitute for hands-on winter instruction.
Wilderness Experts is reader-supported. As an Amazon Associate we earn from qualifying purchases; when you buy through links on our site we may earn a commission at no extra cost to you. It never changes what we recommend.