
Winter hiking: travelling safely on snow and ice
A trail you know well in July is a different place in January. The ground under your boots changes hour by hour, the route markers are buried, the day is half as long, and every mistake costs more because standing still is no longer free. Winter hiking is not summer hiking with a warmer jacket. It is a separate skill set built on three things: choosing the right footing for the snow you are actually standing on, doing honest arithmetic about time and daylight, and staying dry while working hard in the cold. Get those right and winter gives you the best hiking of the year, on empty trails, in country most people never see.
This guide covers travel on snow and ice for hikers and snowshoers on non-glaciated terrain. It will teach you to read the snow surface, choose between bare boots, traction devices and snowshoes, break trail without wrecking your group, plan a day that ends before dark, and recognize the hazards that hide under a smooth white surface. It also covers avalanche terrain honestly, including the point where an article stops being enough and you need a course.
What actually changes in winter
Five things change at once, and they compound.
The surface stops being a surface. In summer the trail supports you. In winter you may be walking on firm crust, breakable crust, bottomless powder, glare ice, or all four in the same mile, sometimes within a single hour as the sun moves. Nothing about your footing is a constant.
Everything takes longer. Estimates vary with conditions, but hikers commonly find that winter cuts their comfortable daily distance to roughly half of the summer equivalent, and one frequently cited figure puts the extra energy cost of moving through snow at around a third more than the same route in summer. You are also slower at every stop, because gloves come off and go back on for every buckle, zip and snack.
The day is short. At 45 degrees north, which is roughly Minneapolis, Montreal, or Salem, Oregon, late December gives you about eight and a half hours between sunrise and sunset. Further north it is worse. A start that feels early in July is a late start in January.
Stopping costs you. In summer, a rest is free. In winter you are producing heat by moving, and the moment you stop, that heat production falls off while your damp layers keep evaporating. A twenty minute stop in a wind can put a well-dressed person into a hole they then have to work their way out of. This is why the injured member of a winter party is in far more trouble than the same person in August.
The margin for error is thin. A twisted ankle at 3pm on a summer afternoon is an inconvenience. The same ankle at 3pm on a December afternoon, two hours from the trailhead in falling temperatures, is a genuine emergency. Read that sentence again before you plan the route, because it is the reason winter parties turn around earlier than they think they need to.
Check access before you check the weather
Trailhead roads, park gates and campgrounds close for the season, often without much notice, and a road closure can add several miles to your day before you take a step on the trail. Check the land manager’s current conditions page, not last year’s memory, and confirm whether the parking area is plowed. Our national park guides list the managing agency for each park so you know whose page to read.
Reading the snow you are standing on
Snow is not one material. Learning to name what is under your feet is what tells you which gear to put on, and it is the single most useful winter skill there is.
Packed trail. Snow that other people have compressed, or that wind and thaw have consolidated. It supports you, and on a cold morning it is often as fast as a summer trail. This is the surface you want, and it is the reason popular winter routes get easier as the season goes on.
Fresh powder. Low density, no structure, no support. You sink to whatever depth the snowpack allows. Beautiful and exhausting.
Breakable crust. The worst surface in hiking. A sun or wind crust strong enough to hold you for one step and not the next, so you take a stride, stop dead, and drop through to the shin or the thigh. It punishes ankles and knees, and it turns a 3 mile (5 km) return into an ordeal.
Glare ice. Freeze and thaw cycles turn a packed trail into a luge run, particularly in gullies, on north-facing traverses, and anywhere water crosses the trail. Ice is the reason winter hikers carry traction on days when there is barely any snow at all, and it causes more winter injuries close to the trailhead than deep snow ever does.
Spring corn and rotten snow. Late in the season, and on any sunny afternoon, the snowpack softens through the day. A surface that carried you at 8am will swallow you to the knee at 2pm. This diurnal cycle is why so many winter and spring routes are planned as an early start and an early finish, not because of storms but because the snow itself has a schedule.
Rule of thumb
Snow gets weaker as the day warms and stronger as it refreezes overnight. If the route depends on firm snow, do it in the morning. If you are postholing badly on the way out, you started too late, and the fix on the next trip is an earlier alarm rather than better gear.
Boots, spikes, snowshoes, or crampons
There are two separate problems in winter footing, and mixing them up is the most common gear mistake there is. Traction is about not sliding on a hard surface. Flotation is about not sinking into a soft one. Different tools solve them, and neither one solves the other.
Winter boots alone. Fine on a firm packed trail with no ice and no steep ground. Insulated and waterproof matters more than aggressive tread, and a boot that fits over a thicker sock without crushing your toes is warmer than a thicker boot that fits tight, because circulation does most of the work. A stiff, supportive backpacking boot such as the Salomon Quest 4 GTX handles frozen ground and a heavy pack far better than a soft trail shoe, and women’s specific lasts such as the Lowa Renegade GTX matter here because a sloppy heel fit costs you both blisters and warmth.
Traction devices, commonly called microspikes. An elastomer harness with short chains and spikes that stretches over the boot. These are the workhorse of winter hiking. They grip packed snow, thin ice and frozen dirt, they go on and off in under a minute, and they weigh little enough that there is no excuse for leaving them in the car. They are not built for deep unconsolidated snow, and they are not built for hard steep ice.
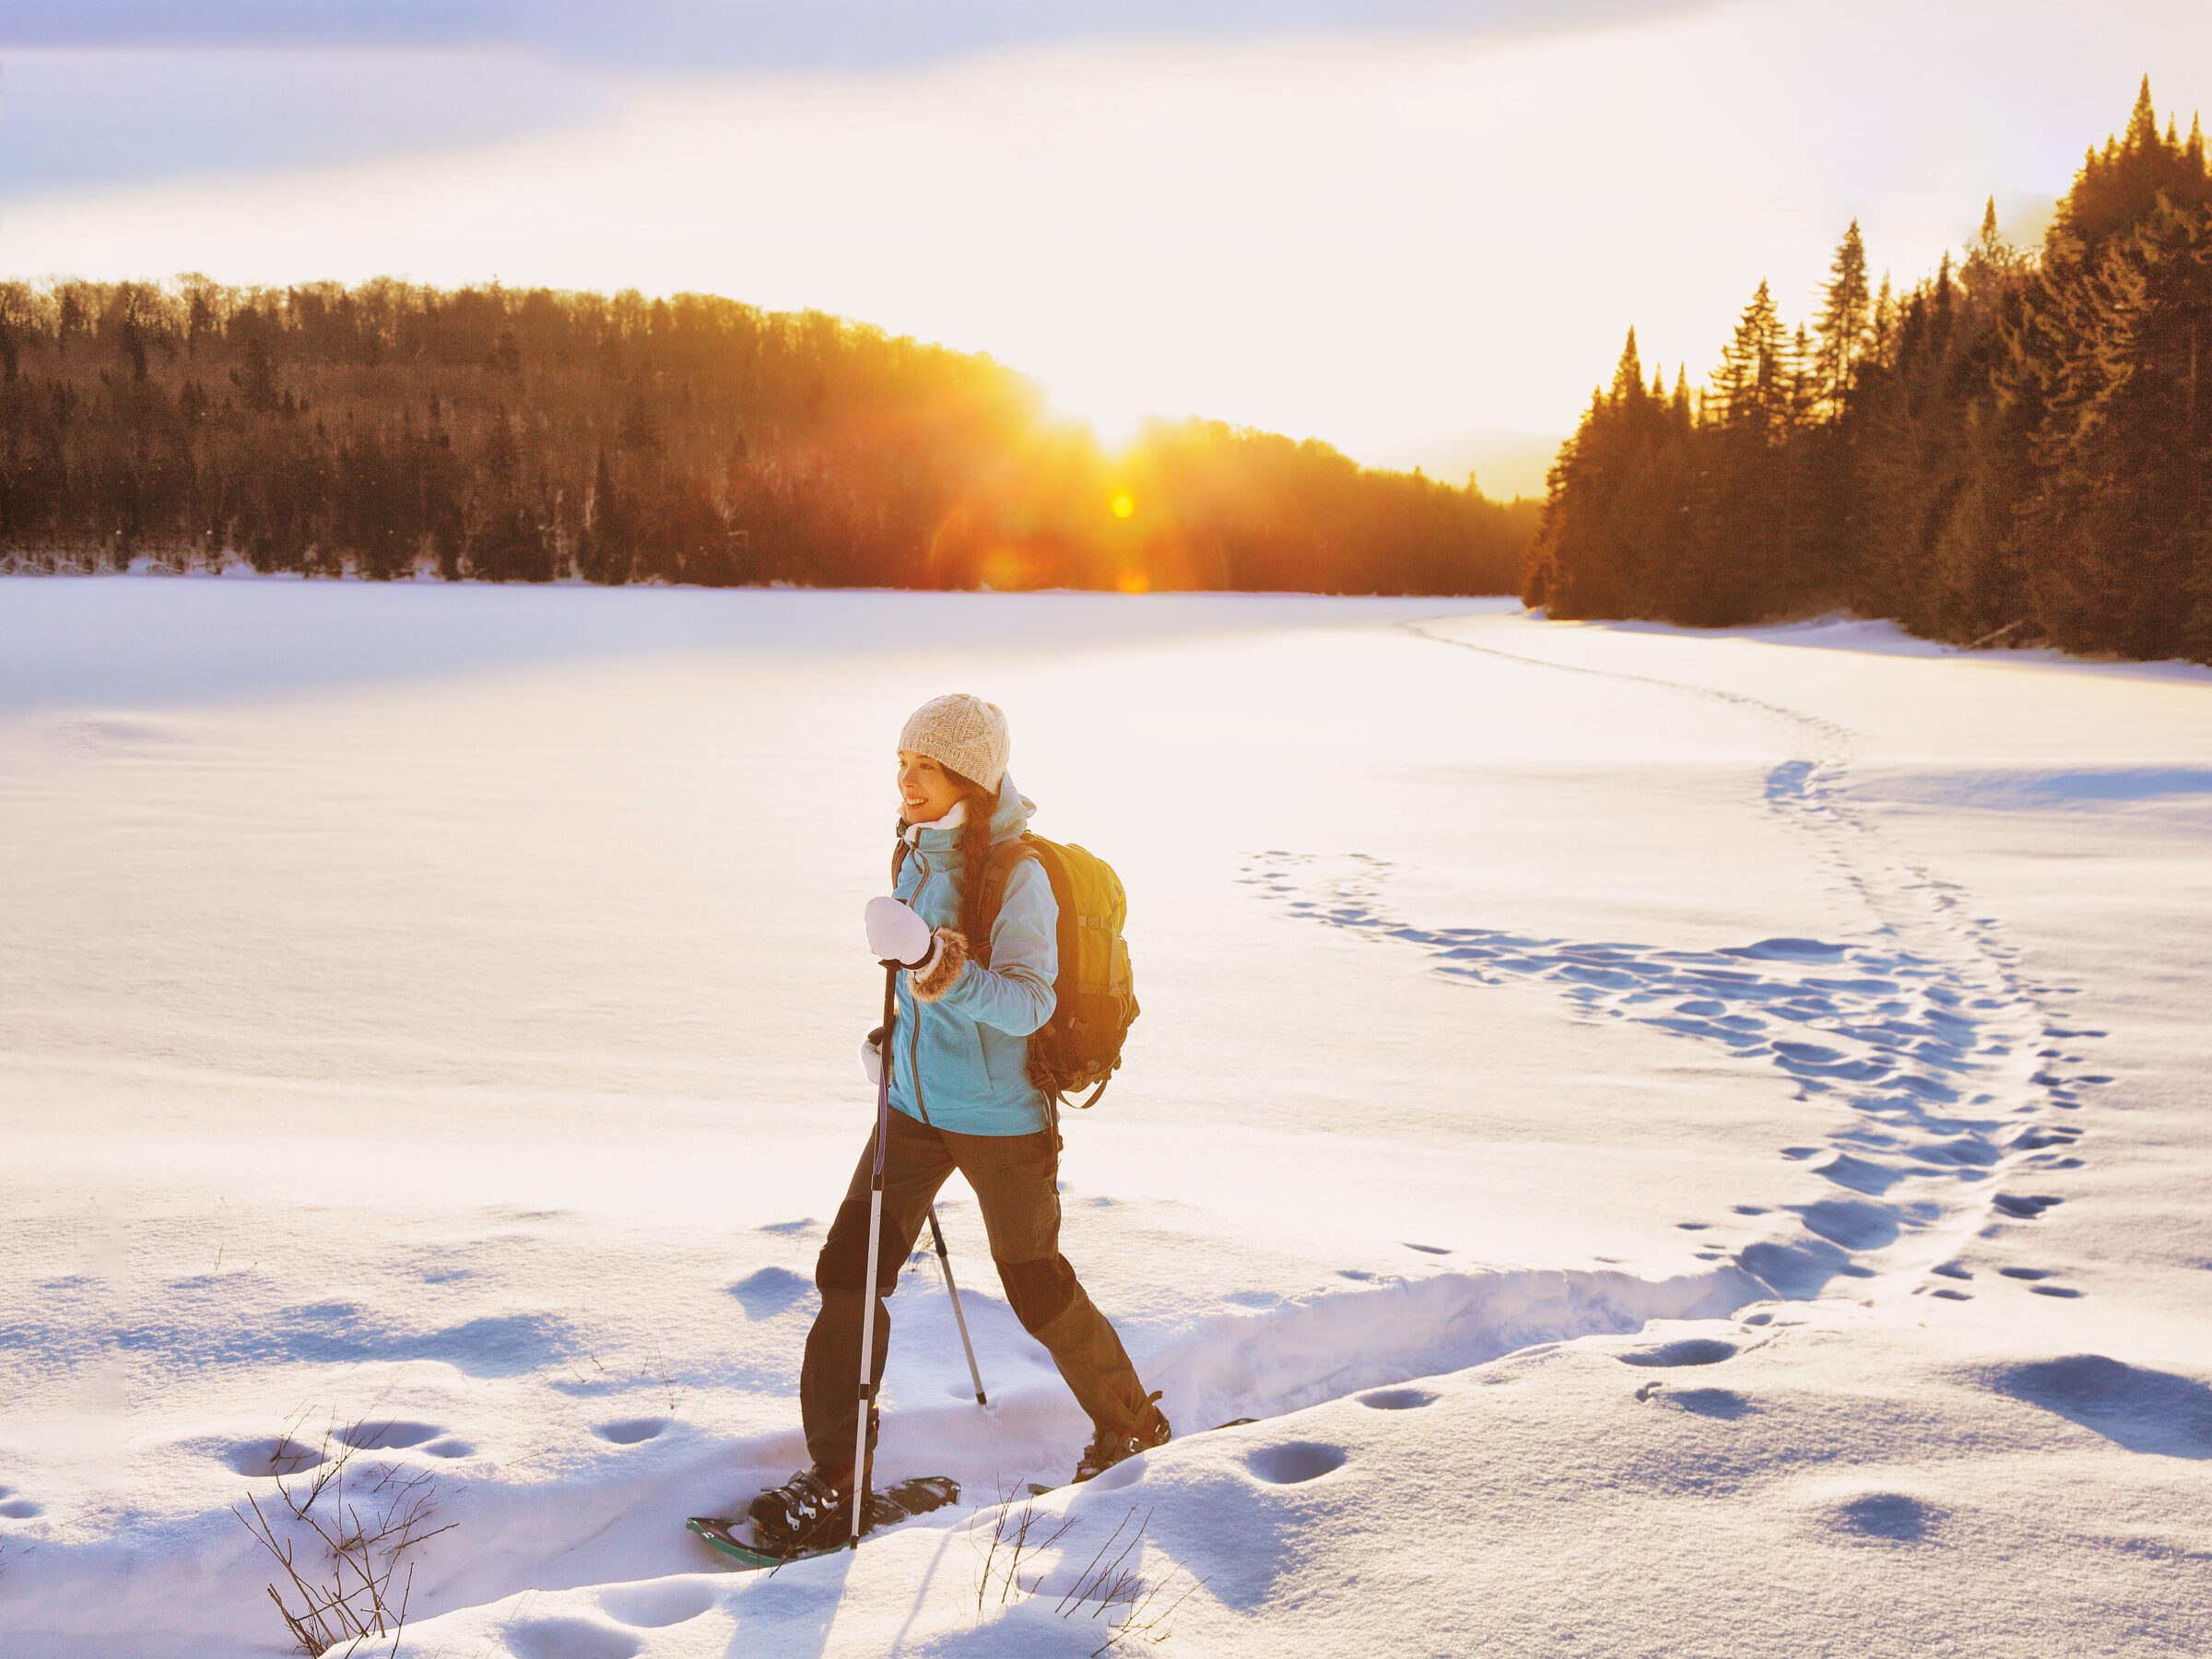
Snowshoes. Flotation. They spread your weight over a much larger area so you sink less. They do not float you on top of fresh powder, and anyone who tells you otherwise has not broken trail. They reduce how far you sink, which is often the difference between a hike and a swim. Beyond that they come in two families that answer different terrain, and the difference is not nostalgia. It changes where you can safely take them.
Modern snowshoes use an aluminum or composite frame with a solid deck. They carry traction hardware underneath: steel teeth beneath the ball of the foot and the heel, which manufacturers call toe and heel crampons, plus rails running along the frame that stop sideways slip on a traverse. That hardware is why they hold on packed trail, crust and moderate slopes, and most of them add a heel lift bar for sustained climbing. The solid deck is the trade. It carries snow on top of itself and flicks it up your back with every stride.
Traditional snowshoes are a steam-bent wood frame strung with rawhide or neoprene lacing. They have no metal traction hardware at all. Grip comes from the lacing and the frame edge pressing into the snow, which is enough on soft snow and reasonable on crust, and which is not enough on hard steep ground or ice. In exchange they float better for their surface area, the open webbing lets snow drop through instead of loading the deck, and they are far quieter, which matters if you want to see animals. In deep soft snow on flat and rolling forested ground, and that describes a great deal of the Canadian and northern United States winter, they are the better tool rather than the older one. Rawhide lacing needs drying after use and occasional varnish; neoprene lacing needs neither.
The traditional patterns are named for their shape and the country they were built for. The Alaskan, also sold as Yukon or trail, is long and narrow for open flat country and deep soft snow. The Huron, also called Michigan, and the Ojibwe are the all-rounders across mixed open and wooded ground, and are the usual answer if you are buying one pair. The bearpaw is short and wide, with the least flotation and the most manoeuvrability, which is what you want in thick bush and tight timber.
Mountaineering crampons. Rigid frames with long points, matched to a stiff boot. These are for sustained hard ice and steep frozen ground, and they belong with an ice axe and the training to use it. If your route needs crampons, it is a mountaineering route rather than a winter hike, and it needs skills this guide does not teach.
How to choose, in one paragraph
Hard and slippery, choose traction. Soft and deep, choose flotation. Steep, hard and consequential, turn around or come back with crampons, an axe, and the training. On mixed days, carry both spikes and snowshoes and swap as the surface changes, because the correct answer changes several times in a day and the cost of carrying the wrong one is far higher than the weight of carrying both. If you are choosing between snowshoe families: deep soft snow on flat, wooded country favours traditional shoes, and anything hard, steep or icy in the day means take modern ones with teeth.
Snowshoes: sizing, bindings, and lifts
Size by total weight, not by height. What matters is you plus everything you are carrying and wearing, so add your winter pack, usually another 10 to 15 pounds (4.5 to 7 kg) for a day, more for an overnight. Manufacturer charts vary, but typical guidance runs roughly: 21 to 23 inches (53 to 58 cm) up to about 160 pounds (73 kg) total, 25 to 27 inches (64 to 69 cm) for roughly 120 to 220 pounds (54 to 100 kg), 30 inches (76 cm) for about 160 to 260 pounds (73 to 118 kg), and 35 to 36 inches (89 to 91 cm) above that. Flotation comes from total surface area rather than length alone, so a short wide shoe and a long narrow one can carry the same load differently in trees. Those figures are modern manufacturer guidance. Traditional shoes are specified as width by length instead, a 10 by 36 inch (25 by 91 cm) Huron or a 12 by 42 inch (30 by 107 cm) Alaskan, and they run larger than a modern shoe for the same person, so size them from the maker’s own chart rather than this one.
Adjust for the snow, not just the person. Deep, dry, unconsolidated snow argues for the longer end of your range, or add-on tails. Mostly packed trails argue for the shorter end, because a shorter shoe is easier to walk in, easier in tight trees, and easier on your hips. Many people who hike packed winter trails are better served by a small shoe than by the biggest one their weight allows.
Bindings are the part that fails. You will be adjusting them with cold hands, in gloves, in the dark, at the end of the day. Modern ratchet and strap systems that you can operate without taking gloves off are worth more than a few ounces of frame weight. Traditional shoes usually use a simple lampwick or leather harness, which is slower to put on and much easier to repair in the field with what you are carrying, and which is worth practising at home until you can tie it cold. Either way, test the binding with the actual boots you will wear, and again with a glove on.
Heel lifts change everything on a climb. On most modern shoes, the small bar that flips up under your heel takes the strain off your calf on sustained uphill and is the difference between an enjoyable climb and a burning one. Learn where yours is by feel, so you can flip it with a pole tip without bending down. Traditional shoes have no lift, which is one of the reasons they are less pleasant on a long climb and one of the reasons they suit flat and rolling country.
Poles are not optional. Fit the wide snow baskets, which most poles ship with in the box and most people leave in the box. Poles give you two extra points of contact on unstable footing, let you test the snow ahead, and take load off your knees on descents. Our reviews of the Cascade Mountain Tech poles, the Black Diamond Trail, and the Distance Carbon FLZ cover the range, and our guide to every use for trekking poles covers the technique.
Moving well: up, down, across, and breaking trail
Uphill. On snowshoes, keep your weight over the deck and use the heel lift on anything sustained if your shoes have one. Where the slope steepens, kick a step: drive the toe in to make a small platform and then stand on it. On firm snow, a herringbone with toes out works on moderate ground, and switchbacks work better than a direct line the moment the slope steepens.
Downhill. Sit back slightly, keep your knees soft, and let your heels lead. On snowshoes in soft snow you can stride down confidently, and the temptation to run is worth resisting because you cannot see what is under the surface. On firm snow with spikes, shorten your stride and keep your feet under you. Poles go long on descents.
Traverses. The hardest ground in winter. Your uphill ankle rolls, your downhill edge gets no purchase, and a slip becomes a slide. Kick a level platform for each foot rather than trying to edge across, keep the pole on your uphill side short and the downhill one long, and treat a long icy traverse above a runout as a genuine turnaround decision. Steep firm snow slopes, and the self-arrest technique for stopping a slide on them, are covered in our guide to crossing difficult terrain.
Breaking trail. This is the hidden work of winter hiking, and the person in front is doing several times the work of the person in fourth place. Rotate the lead on a fixed interval, five or ten minutes, and rotate it before the leader is spent rather than after. The leader steps aside, the line passes, and they fall in at the back. Done properly, a group of four can travel most of the day. Done badly, one strong person destroys themselves in an hour and the whole party is now dealing with an exhausted member in the cold.
Follow the steps exactly
Behind the leader, step in the holes already made. Every boot that lands in the same place makes the track firmer for everyone behind, and a party that walks in a neat single file leaves a packed trail that carries them home at twice the speed. Spreading out sideways wastes the work.
Winter arithmetic: pace, distance, and daylight
Winter breaks the pace assumptions that work the rest of the year. Useful working numbers, with the caveat that snow varies enormously:
- Firm packed trail with traction: close to your summer pace, sometimes faster, often 2 to 3 miles per hour (3 to 5 km/h).
- Breaking trail in calf-deep snow: roughly 1.5 to 2 miles per hour (2.5 to 3 km/h).
- Breaking trail from calf to knee deep: around 1 mile per hour (1.6 km/h).
- Breaking trail deeper than mid-thigh: three quarters of a mile per hour (1.2 km/h) at best, and that is with a group rotating the lead.
Sit with those numbers for a second. A 6 mile (10 km) loop that takes three hours in summer takes eight hours if you are breaking knee-deep trail for most of it, and eight hours does not fit inside a December day that started at 9am.
Work backwards from sunset, not forwards from the trailhead. Look up the actual sunset time for the date and location, subtract an hour for the fact that a valley or a north-facing forest goes dark well before the sky does, and set a hard turnaround time. Then subtract again for the reality that your return is often slower than your outbound leg, because you are tired, the snow has softened, and the light is going. Our guide to pacing and turnaround times covers the arithmetic in detail, and it matters more in winter than in any other season.
Assume you will finish in the dark at least once. That is not a failure, it is a normal winter outcome, and it is only a problem if you do not have a headlamp with fresh batteries and a spare set. Every member of the party carries one. A group with one headlamp between four moves at the speed of a group with no headlamps.
Staying dry is staying warm
The whole cold-weather clothing problem reduces to one sentence: your own sweat is more dangerous than the weather. A hard climb in insulated layers soaks your base layer, and that damp fabric keeps pulling heat out of you long after you stop climbing. Nearly every miserable winter day starts here.
Start cold. Leave the trailhead wearing less than feels comfortable, so that you are slightly chilly for the first five minutes. You will warm up within a quarter mile. If you are comfortable standing at the car, you are overdressed for walking.
Vent before you sweat, not after. Open pit zips, drop the hood, take off the hat, push up your sleeves, and do it at the bottom of the climb rather than halfway up when you are already wet. Your hat and your hands are your fastest thermostat.
Put a layer on the moment you stop. This is the single habit that separates comfortable winter hikers from cold ones. A warm insulated jacket lives at the top of the pack, comes out at every break, and goes back in before you start moving. A synthetic insulated jacket keeps working when it is damp, which is the argument for synthetic over down as your stop-layer, while a down piece gives you more warmth for the weight when you can keep it dry.
Never wear cotton, and take the hint about socks. Wool or synthetic next to the skin, always. Merino base layers such as the Smartwool Merino 250 and the women’s equivalent hold warmth when damp and do not stink. Carry a spare pair of wool socks and change them at lunch if your feet are wet, because wet feet in the cold is how trench foot and frostbite start. The full clothing system is covered in what to wear in the bush.
Gaiters keep the snow out. Without them, snow packs into the gap at the top of your boot, melts against your sock, and refreezes. On any day with snow deeper than your ankle, gaiters are worth more than most of the gear in your pack.
Water that does not freeze, food you can still eat
You are dehydrated and you do not feel thirsty. Cold triggers peripheral vasoconstriction, which pushes blood toward your core, and your body reads that as being well filled. Thirst is suppressed and you also urinate more, an effect called cold-induced diuresis. On top of that, you lose water with every breath into dry winter air. One frequently cited laboratory study found people felt roughly 40 percent less thirsty exercising at 39°F (4°C) than at 81°F (27°C), whether or not they were actually short of fluid. Drink to a schedule in winter, not to thirst.
Hydration hoses freeze, and they freeze at the bite valve first. If you use a reservoir, blow the water back into the bladder after every drink and insulate the hose, or accept that you will be carrying a solid tube by mid-morning. Many winter hikers simply switch to bottles.
Bottles freeze from the top down. A wide-mouth bottle such as a Nalgene 32 oz resists this far better than a narrow one, because a narrow neck plugs with ice while there is still liquid below it. Carry it upside down in an insulated sleeve so the ice forms at what is now the bottom. An insulated bottle filled with hot water is even better, and doubles as something warm to hold.
Stoves behave differently in the cold, and the reason is physics. Canister fuel is a blend, and the components boil at different temperatures: propane at about -44°F (-42°C), isobutane at roughly 11°F (-12°C), n-butane at about 31°F (-0.5°C). As you burn a canister, the propane leaves first, so the remaining mix performs worse and worse as the canister empties and the temperature drops, which is why a stove that lit fine at the trailhead sputters at lunch. A regulated stove such as the MSR WindBurner holds performance much better in cold and wind than a simple burner. Keep the canister inside your jacket before use, never in the snow, and never apply a flame to warm a canister.
Food you cannot chew is not food. Energy bars go rock hard below freezing. Choose fats and softer foods, keep the day’s snacks in a jacket pocket rather than the pack, and eat little and often, because digestion is part of how you stay warm. Our guide to what food to bring covers the calorie arithmetic.
What is under the snow
A smooth white surface hides the terrain, and several of winter’s real dangers are simply things you cannot see.
Tree wells and deep snow immersion. Around the trunk of a conifer, the branches shed snow and leave a void of loose, unconsolidated snow, sometimes several feet deep. Fall into one, usually head first, and the snow collapses in around you. This is not a theoretical hazard: in immersion research, around 90 percent of people placed in these situations could not get themselves out without help, and death can follow within 15 to 30 minutes from suffocation as the snow blocks the airway and traps exhaled carbon dioxide. Most documented cases involve skiers and riders in deep snow at resorts, but the mechanism is identical for a snowshoer in a tree-choked slope after a big storm. Stay away from the base of large conifers in deep new snow, and keep your partner in sight, because the only reliable rescue is a companion who saw where you went.
Spruce traps and buried deadfall. The same principle in miniature. Small buried trees, log piles and boulder fields create hollows under an unbroken crust. You step, the crust fails, and your leg goes in to the hip with your snowshoe wedged sideways. Most of the time this is a nuisance and a bruise. Occasionally it is a broken leg a long way from the road.
Buried water. Streams keep running under snow all winter, hollowing out the pack from below. What looks like a smooth snowfield across a drainage can be a shell over moving water. Cross drainages where they are narrow and shallow, look for the tell-tale dip or dark line that traces a creek, and if you can hear water under your feet, you are in the wrong place.
Cornices. Wind builds an overhanging lip of snow on the lee side of ridges, and it extends far further out over nothing than it looks from above. Ridge walking in winter means staying well back from the edge, on the windward side, because the fracture line runs behind where you think the edge is.
Frozen lakes, creeks, and snow bridges
A frozen lake is a tempting shortcut and a serious decision. Guidance differs by country, and the conservative number is the one to use. The Canadian Red Cross publishes a 15-20-25 rule for new, clear, hard ice: at least 6 inches (15 cm) for one person on foot, 8 inches (20 cm) for a group in single file, and 10 inches (25 cm) for a snowmobile. Some United States agencies publish a lower figure of about 4 inches (10 cm) for a person on foot. If the two disagree, take the thicker number, because nobody has ever regretted it.
Thickness alone is not the whole answer:
- Colour matters. Clear blue or black ice is strong. White or opaque ice, formed from saturated snow, is substantially weaker. Grey ice means water is present and it should be treated as unsafe.
- Moving water destroys ice. Inlets, outlets, narrows, springs and anywhere current runs will be thinner, sometimes dramatically so, and often with no visual warning.
- Snow cover insulates and hides. A layer of snow slows ice growth and conceals cracks, pressure ridges and open leads.
- It varies over a few paces. Thickness must be checked repeatedly across a crossing, not once at the shore.
Ice is a decision you can decline
Unless you are on a marked, monitored, and locally confirmed ice route, the shoreline detour costs you time and the ice costs you everything. If you do cross, spread the party out, unbuckle your pack’s hipbelt and sternum strap so you can shed it, and carry something to grip the ice with. If someone goes through, read surviving cold-water immersion and falling through ice before you need it, not after.
Avalanche terrain, and where this article stops
Avalanches kill roughly 27 people a year in the United States and around 10 or 11 a year in Canada, based on recent ten-year averages, and the people they kill are overwhelmingly experienced backcountry users rather than beginners. Almost all of those deaths happen in terrain the party chose to enter.
Here is the awareness-level knowledge that every winter hiker should carry:
Slope angle is the master variable. Analysis of a large Swiss avalanche dataset found that about 96 percent released on slopes between 30 and 50 degrees, with the bulk between 34 and 45 degrees. Below roughly 30 degrees, slabs rarely release. Above roughly 50 degrees, snow tends to sluff off continuously instead of building into a slab. That middle band is also, unhelpfully, exactly the angle range that makes for good skiing and interesting hiking.
You are not safe just because you are not on the slope. Avalanches run out well past the bottom of the steep part, and you can trigger a slope from below or from a connected flat. Ask what is above you, not just what you are standing on.
Read the forecast before you go, every time. Avalanche Canada covers much of the Canadian backcountry and Avalanche.org, a partnership between the American Avalanche Association and the US Forest Service National Avalanche Center, aggregates the United States forecast centres onto one national danger map. Both are free, both publish a daily danger rating with the specific problems and the aspects and elevations they apply to, and both are more informative than any amount of looking at the snow from the trailhead.
Terrain choice is the tool you actually have. The reliable way for a hiker to manage avalanche risk is to choose low-angle terrain that is not underneath high-angle terrain, and to travel there. Valley trails, gentle forested routes and rolling country are winter hiking. Open bowls, gullies, and slopes at the angle that makes you want to switchback are a different activity.
This article does not make you avalanche safe
Reading about avalanches builds awareness, not competence. If your winter plans include any avalanche terrain, take a recreational course: Avalanche Skills Training 1, run to the national standard by Avalanche Canada, or AIARE 1 in the United States, taught to a common curriculum by more than a hundred providers. Both are two-day entry-level courses with no prerequisites, covering terrain recognition, forecast use, trip planning, and companion rescue. Rescue gear (a transceiver, probe and shovel, carried by every member of the party) is useless without the practice to use it inside the few minutes that matter. Until you have that training, plan routes that stay out of avalanche terrain entirely, which is a completely legitimate way to spend a winter.
Navigating a buried trail
Snow erases the path. Cairns are covered, blazes sit above or below eye level depending on snow depth, and the boot track you are following may belong to someone who was also lost. Winter navigation is real navigation.
Do not trust the track in front of you. A well-packed trail is enormously seductive and it might lead to somebody’s turnaround point, a different summit, or nowhere. Check it against your map and your intended bearing at every junction and every time it changes direction.
Carry map and compass, and know the declination. Our guide to map and compass navigation covers the technique, and each of our park pages lists the current magnetic declination for that location. A baseplate compass works at any temperature and never needs charging, which is exactly why it belongs in your pocket in winter.
Batteries fail in the cold, and one failure mode is permanent. Lithium-ion capacity drops substantially below freezing, with commonly quoted losses of 20 to 30 percent in moderate cold and considerably more in hard cold. Carry your phone and GPS in an inside pocket against your body, not in a pack lid. Critically, do not charge a lithium battery that is below freezing, because charging a frozen cell can damage it permanently. Warm the device against your body first, then charge from a power bank kept warm inside your jacket.
Whiteout is a winter default, not an exception. Flat light in falling snow removes contrast entirely, and you can lose the ability to see a 3 foot (1 m) drop directly in front of you. Our guide to low-visibility navigation covers bearings, pace counting and handrails, and all of it applies the moment the cloud comes down.
Sun, wind, and the things that burn you in the cold
Snow reflects a large share of incoming ultraviolet light, widely put at up to about 80 percent, so on a bright winter day you are being lit from above and below at once. Two consequences follow, and both catch people out because it does not feel hot.
Snow blindness is sunburn on the surface of your eye. It develops hours after the exposure, it is intensely painful, and it can leave you unable to see well enough to walk out. Wear proper sunglasses with full ultraviolet protection on any bright snow day, and choose wraparound or side-shielded frames on open snow at elevation. Carry a spare pair or improvised slit goggles, because losing your glasses on a snowfield is a serious problem.
Sunburn arrives from underneath. Sunscreen on the underside of the chin, the nose, and the inside of the nostrils and ears. People routinely come off a February snowfield burned worse than they ever got in August.
Wind is the multiplier. Wind chill does not lower the air temperature, but it dramatically increases how fast exposed skin loses heat, which is the number that matters for frostbite. A calm 5°F (-15°C) day and the same temperature with a 25 mph (40 km/h) wind are different environments. Cover every square inch on exposed ridges, and treat the wind forecast as being as important as the temperature.
When something goes wrong
The winter version of every problem is the same problem plus a clock. An injured or exhausted person stops generating heat almost immediately, and the party’s job changes from travelling to preventing hypothermia while help comes.
Insulate immediately, and from the ground. Get the person off the snow before you do anything else, onto packs, foam, branches, anything. A closed-cell foam pad weighs little, cannot puncture, and is one of the highest-value items in a winter day pack for exactly this reason.
Add every layer in the group. Their spare insulation, then yours. Cover the head and hands, get a windproof layer over everything, and add an emergency bivvy or group shelter around them. Chemical hand warmers in the armpits and against the torso are worth carrying all winter for the weight.
Calories and warm fluids if they are fully alert. Not if consciousness is impaired.
Call early. A winter evacuation is slow, resource-heavy, and often cannot happen after dark. The decision to call is one you want to make with hours of daylight left rather than at the point where it becomes obvious. Cell coverage is unreliable in winter terrain, which is the argument for a satellite messenger or a personal locator beacon. Our guide to signaling for rescue covers what to do while you wait.
Do not split the party to go for help unless you have no other option, and if you must, send two, with the location written down, and leave the strongest insulation with the person staying.
Group travel, solo travel, and turning back
Winter rewards small competent groups. Three or four people can rotate trail breaking, share a rescue, and still move quickly. Large groups move at the speed of their slowest member on a day that has no spare hours in it.
Solo winter travel raises the stakes on every hazard in this guide. A tree well, a broken ankle, or a soaking in a creek is survivable with a partner and can be fatal alone. If you go solo, stay on popular routes, leave a detailed plan with someone who will act on it, and carry a two-way satellite device. Our Trip Planner generates that plan and can send it to your contact for you.
Set turn-back triggers before you leave, and make them specific. A time, a landmark, and a set of conditions. Any one of these should end the day:
- Your turnaround time arrives, wherever you are.
- Anyone in the party cannot get warm at a stop, or stops shivering while still cold.
- The trail-breaking is deeper or slower than planned and the arithmetic no longer works.
- The route ahead needs gear or skills you do not have with you, including avalanche terrain you did not expect.
- Visibility drops to the point that you are navigating on faith.
Turning around in winter is not a failed day. It is the mechanism by which winter hikers keep getting to do winter hiking.
Common mistakes
- Bringing traction or flotation, but not both. The surface changes through the day. Spikes on a powder slope and snowshoes on glare ice are equally useless.
- Starting too late. Nearly every winter epic traces back to a start time, not to a gear choice.
- Dressing warmly at the trailhead. You will be soaked within a mile, and that sweat is what makes you cold later.
- Skipping the layer at stops. Insulation you did not put on because the break was going to be short is the most common reason people arrive back cold.
- Not drinking. You will not feel thirsty. Drink anyway, on a schedule.
- Trusting a boot track. Somebody else’s footprints are not a route.
- One headlamp for the group. Everyone carries light and spare batteries, kept warm.
- Treating a lake as a shortcut. Detour around it unless the ice is confirmed.
- Wandering into avalanche terrain by accident. Most hikers who get caught did not know they had entered it. Look up at the slope above you, and learn what 30 degrees looks like.
What to carry
Everything in the Ten Essentials still applies, plus the following. This is a day-hike list. Overnights add a sleep system built for the temperatures, covered in how to stay warm through a cold night, which in practice means a pad with the R-value to match, such as the Therm-a-Rest NeoAir XTherm, and a shelter designed to shed snow load, such as the MSR Access 2.
- Traction, and flotation if the snow warrants it. Microspikes live in the pack all winter. Snowshoes come along when the snow is unconsolidated or deep.
- Gaiters, on any day with snow above the ankle.
- Trekking poles with snow baskets fitted.
- An insulated jacket that stays at the top of the pack, such as a synthetic puffy for damp conditions or a down piece when you can keep it dry.
- Spare hat, spare gloves, and a second spare pair of gloves. Gloves get wet, and wet gloves in the cold end days.
- Spare wool socks in a dry bag.
- A headlamp per person, plus spare batteries kept warm. The day will be shorter than you think.
- Full ultraviolet sunglasses and high-SPF sunscreen, plus a spare pair of glasses on open snow.
- Insulated water, a wide-mouth bottle in a sleeve carried upside down, or an insulated bottle of something hot.
- Food you can eat frozen, carried in a jacket pocket.
- A closed-cell foam sit pad, which is your casualty insulation and your lunch seat.
- An emergency bivvy and chemical hand warmers.
- A first-aid kit you have actually opened, with tape for blisters and a way to improvise a splint.
- Map, compass, and a charged device kept warm, with a power bank inside your jacket.
- A satellite messenger or beacon, and a trip plan left with someone at home.
Plan your winter trip with the Trip Planner
Key takeaways
Winter hiking is a separate skill, not a colder version of summer. Learn to name the surface you are on, because that is what decides your gear: traction for hard and slippery, flotation for soft and deep, and both in the pack on days that will be mixed. Know which snowshoe you are on, because modern ones carry steel teeth that hold on crust and moderate slopes while traditional wood-and-rawhide ones carry none, float better for their size, and belong on flat, wooded, deep-snow country. Size them by your total weight including the pack, fit snow baskets to your poles, and rotate the lead when breaking trail before the leader is spent. Do the arithmetic honestly, because breaking knee-deep trail runs about 1 mile per hour (1.6 km/h) and a December day is short, so work backwards from sunset and set a hard turnaround. Manage sweat above all else: start cold, vent early, and put an insulated layer on at every single stop. Drink on a schedule, because cold suppresses thirst and increases your losses. Respect what the snow hides, including tree wells, buried creeks, cornices, and lake ice that is thinner than it looks, and take the conservative ice number when guidance disagrees. Stay out of avalanche terrain unless you have taken a course, carry the rescue gear and practise with it, and remember that slope angle between 30 and 45 degrees is where almost everything releases. Keep batteries warm and never charge a frozen one. Carry a headlamp each and expect to use it. And treat turning around as the ordinary, skilled decision it is, because the winter margin is thin and the trail is still going to be there in March.
Avalanche figures reflect recent ten-year averages published by the Colorado Avalanche Information Center for the United States and Avalanche Canada for Canada, and the slope-angle distribution comes from analysis of a large Swiss avalanche dataset. Ice thickness guidance follows the Canadian Red Cross 15-20-25 rule, which is more conservative than several United States agency figures. This is general education and not a substitute for an avalanche course or professional instruction.
Wilderness Experts is reader-supported. As an Amazon Associate we earn from qualifying purchases; when you buy through links on our site we may earn a commission at no extra cost to you. It never changes what we recommend.