
Avalanche safety: how to recognize avalanche terrain and stay out of it
Avalanches kill around 27 people a year in the United States and about 11 a year in Canada, and the people they kill are not the unlucky tourists you might picture. They are overwhelmingly experienced backcountry users: skiers, snowmobilers, climbers and snowshoers who knew something about snow and went into avalanche terrain anyway. More than nine out of ten fatal avalanches are triggered by the victim or by someone in the victim’s own party. That single statistic is the most useful thing in this article, because it means the hazard is almost never something that happens to you. It is something you walk into, and therefore something you can decline.
This guide covers what avalanche terrain looks like, how a slab avalanche works, how to read a public avalanche forecast, how to plan a winter route that stays out of trouble, what to do in the seconds if you are caught, and how companion rescue actually works. It is written for the hiker, snowshoer and winter camper rather than the ski mountaineer, and its central argument is that terrain choice, not snow science, is the tool most of us should be using. Getting to camp safely on snow and ice is covered in winter hiking: travelling safely on snow and ice, and spending the night out there in winter camping. This article owns the avalanche question that both of those point to.
Reading this article does not make you avalanche safe
There is no version of this text, or any text, that substitutes for a recreational avalanche course. Avalanche judgment is a physical skill built on a slope with an instructor, and the gap between knowing the words and being able to use them is where people die. If your winter plans include any avalanche terrain, take Avalanche Skills Training 1 in Canada or AIARE 1 in the United States. Until then, plan routes that stay out of avalanche terrain entirely. That is a complete and legitimate way to spend a winter, and most of this article is about how to do it.
Who avalanches actually kill
The public picture of an avalanche is a wall of snow arriving out of nowhere at a village or a road. That kind of avalanche exists, and highway and rail operations spend a great deal of money managing it, but it is not what kills recreational users. What kills recreational users is a slope they chose to travel on, releasing under their own weight, on a day when the forecast said it might.
The numbers are worth consideration. Over the last ten winters an average of 27 people a year have died in avalanches in the United States, according to the Colorado Avalanche Information Center, which is the national archive for avalanche accidents. Canada averages around 11 a year. Those are small numbers against the total population of people who go out in winter, and they are not a reason to stay home. But they concentrate in a particular kind of person. Snowmobiling and backcountry skiing together account for roughly seven in ten Canadian avalanche fatalities on record since 1999. These are committed, skilled, well-equipped people in the places they most wanted to be.
The second number matters more than the first: more than 90 percent of fatal avalanches are triggered by the victim or by a member of the victim’s party. The snow did not choose the moment. A person put weight on a slope that was already loaded and waiting, and the slope responded. This is genuinely good news, because it means the hazard is under your control to a degree that almost no other mountain hazard is. You cannot decline a lightning storm that builds faster than you can descend, and you cannot decline a rock that comes down a gully. You can decline a slope.
The third number sets the stage for everything in the second half of this article. A study of 204 avalanche deaths in British Columbia and Alberta across 21 years found that 75 percent died of asphyxia, 24 percent of trauma, and 1 percent of hypothermia. Asphyxia dominates, which is why speed of extraction is everything and why your companions, not a helicopter, are the rescue. Trauma is not a rounding error however, and it varies enormously by activity: 9 percent among snowmobilers, rising to 42 percent among ice climbers, where the terrain below the slope is cliffs and rocks rather than an open runout. No rescue gear helps with trauma; only terrain choice does.
How a slab avalanche works
Nearly every avalanche that kills a recreational user is a slab avalanche, and understanding its anatomy is key to understanding avalanches in general.
Snow does not fall as a single uniform substance. It arrives in storms, separated by fair weather, and each storm lays down a layer with its own character. What matters is that some of those layers are strong and cohesive, and some are weak.
A slab avalanche needs three things stacked together:
- A slab. A cohesive layer of snow that holds together as a sheet. Wind-packed snow makes excellent slabs. So does snow that has settled and bonded under its own weight. The defining property is that it behaves like a plate rather than like sugar.
- A weak layer underneath it. A layer that cannot carry the load above. The common culprits have names you will see in forecasts: surface hoar, the feathery frost that grows on the snow surface on cold clear nights and then gets buried by the next storm; depth hoar, large loose sugary crystals that form at the base of a shallow snowpack; and facets, angular grains that form when the snowpack has a strong temperature difference across it. All three are structurally unsound and can sit buried and intact for weeks or months.
- A bed surface. A smooth firm layer beneath the weak layer for the slab to slide on. Often an old crust from a thaw or a rain event.
When a trigger, usually a person, adds enough load in the right spot, the weak layer collapses. Because the slab above is cohesive, that collapse propagates outward through the weak layer at speed, and the whole sheet releases at once along a crown line that can be hundreds of feet across. This is the crucial and counter-intuitive point: a slab avalanche does not start under your feet and grow. A slab that you trigger from near the bottom of a slope can release the entire slope above you, and you will be looking up at a fracture line you had nothing to do with reaching.
Once moving, a dry slab is fast. It reaches roughly 20 mph (30 km/h) in the first two or three seconds and commonly runs at 60 to 80 mph (100 to 130 km/h). There is no version of the story where you outrun it, ski away from it downhill, or react your way out of it. Everything useful happens before the fracture.
The snow that stops around you is not the fluffy powder that was falling. Avalanche debris is churned, compacted and mixed, and it sets like concrete within seconds of stopping. People buried a foot (30 cm) deep routinely cannot move a finger, cannot expand their chest to breathe deeply, and cannot dig themselves out. This is the single fact most people get wrong about avalanches, and it is the reason the rescue kit exists.
The avalanche problems, and why forecasters name them
Modern North American forecasts do not simply say “the danger is moderate” and leave you to it. They name the specific avalanche problem in play, which is the forecaster’s description of what kind of avalanche is possible, where it is to likely be found, and how it behaves. Learning the nine problem names is the highest-value hour of reading you can do, because the problem tells you what to avoid far more precisely than the danger rating does.
- Storm slab. New snow from the current storm bonding poorly to itself or to the old surface. Widespread across whatever terrain got the snow, and usually settles out within hours to a few days. The most predictable problem on the list.
- Wind slab. Wind moves snow from windward slopes and deposits it thicker on the lee side, building stiff slabs in specific, findable places: just below ridge crests, behind rollovers, and across gully walls. Wind can build a dangerous slab on a day with no snowfall at all.
- Persistent slab. A slab sitting on a buried weak layer such as surface hoar or facets. This is the problem that catches experienced people, because the snow surface looks and feels fine and the weakness is out of sight and out of mind. Persistent slabs stay dangerous for weeks.
- Deep persistent slab. The same thing, but with a thick heavy slab built up over a weak layer near the ground. Rare to trigger, catastrophic when triggered, and very hard to predict. Usually triggered from a thin spot in the snowpack.
- Dry loose. Point-release sluffs in unconsolidated dry snow, fanning out from a single point. Usually small, but capable of knocking you off your feet into terrain where that matters.
- Wet loose. The same, in wet snow, typically during daytime warming or rain.
- Wet slab. Water percolating through the snowpack weakens a buried layer and the slab above releases. Often tied to the first serious thaw or rain of the season.
- Cornice fall. A cornice is the overhanging lip of wind-drifted snow that builds out past the edge on the lee side of a ridge. It can break off under your weight if you walk near the ridge edge, and it can fall on its own and trigger the slope below.
- Glide. The whole snowpack creeping downhill on smooth ground such as grass or slab rock, opening glide cracks. Essentially unpredictable in timing, so the answer is to not spend time below open glide cracks.
For a hiker or snowshoer, the practical takeaway is that wind slab and persistent slab are the two to understand. Wind slab is findable: it lives in specific terrain features you can identify from a map and avoid. Persistent slab is not findable by looking, which is precisely why the forecast exists.
Slope angle: the master variable
If you take one measurable thing from this article, it is this: analysis of a large Swiss avalanche dataset found that about 96 percent of slab releases occurred on slopes between 30 and 50 degrees, with the bulk concentrated between 34 and 45 degrees.
Below roughly 30 degrees, slabs rarely release, because gravity is not pulling hard enough along the slope to overcome even a weak bond. Above roughly 50 degrees, snow tends to sluff off continuously as it falls rather than accumulating into a slab, so there is less there to release. The killing band is the middle.
The unhelpful part is that 30 to 45 degrees is also exactly the angle range that is interesting to travel on. It is the angle that makes good skiing. It is the angle where a hiking trail starts switchbacking. It is the open slope that looks like an obvious shortcut up to a ridge. Your instinct for a nice line and the avalanche’s requirements overlap almost perfectly.
Learn to estimate angle, then learn to distrust your estimate. People routinely underestimate slope angle by 5 to 10 degrees, and the error runs in the dangerous direction: slopes look gentler than they are, particularly from above and in flat light. Two reliable ways to get a real number:
- Measure it on the map before you go. Most mapping apps will shade terrain by slope angle, usually colouring the 30 to 45 degree band. This is the single most useful map layer in winter, and it turns route planning into something you do at the kitchen table. See your phone as a backcountry GPS for setting up offline maps properly.
- Measure it on the ground with an inclinometer. Many compasses include one, including the baseplate models covered in map and compass navigation. Sight along the slope, read the angle. Do this often enough on slopes you have already measured on the map and your eye calibrates.
One warning about map slope shading: it is computed from a digital elevation model with a grid spacing that is often 30 to 100 feet (10 to 30 m), so it smooths away small steep features. A convex rollover or a short steep bank can be well into the danger band and show as gentle on the map. The map tells you where the big terrain is. Your eyes still have to keep assessing the situation.
Recognizing avalanche terrain
An avalanche path has three parts, and you need to be able to name all three when you look at a slope.
- The start zone. The steep upper section where the slab releases, typically 30 to 45 degrees.
- The track. The middle section the debris runs down, often a gully, a chute, or an open slope.
- The runout. The flatter ground at the bottom where the debris stops and piles up. This is the part people get wrong. A runout can extend a long way past the bottom of the steep part, out onto ground that is completely flat and that feels like the safe part of the valley.
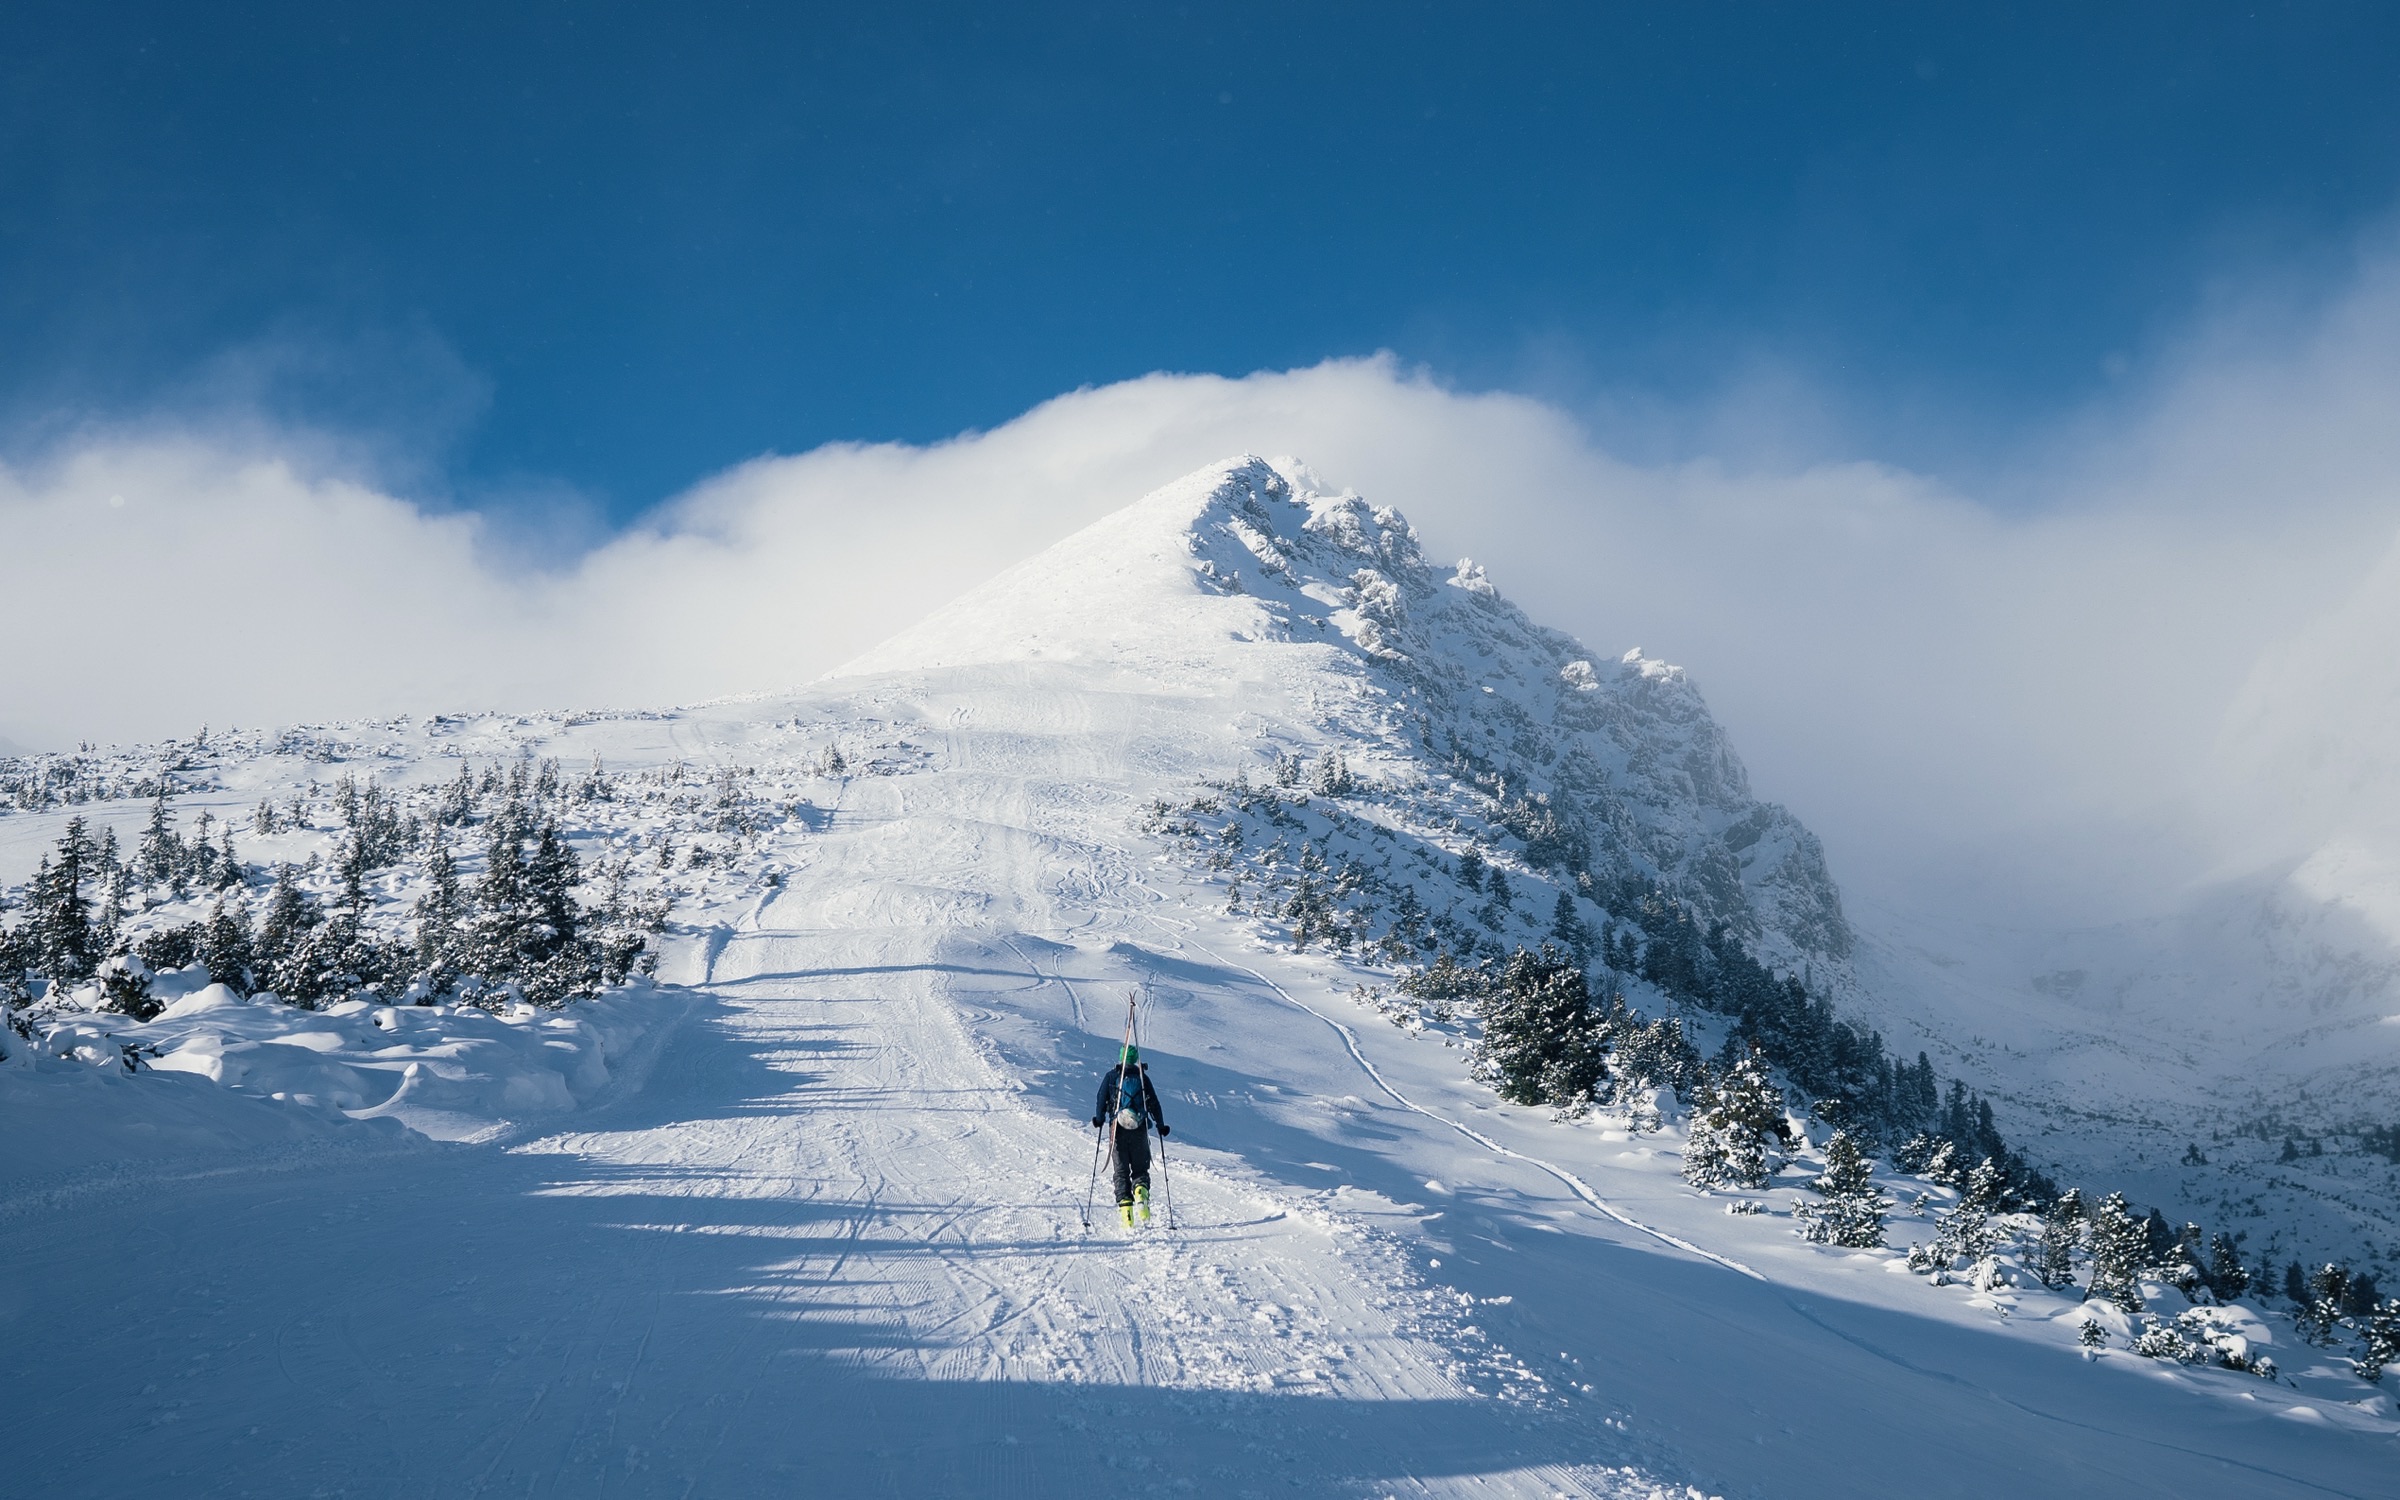
Standing in a runout zone is standing in avalanche terrain. So is crossing a flat bench below an open slope. So is stopping for lunch at the bottom of a gully because it is out of the wind, which is a specific and recurring way that parties get caught while doing nothing that looks like avalanche travel at all.
Features that tell you a path is a path, visible even in summer:
- Trimlines. A strip of missing or younger forest running down a slope, with a sharp edge against the mature trees on either side. Avalanches cut that line, and the width of the cleared strip tells you how big they run.
- Flagged trees. Trees with branches stripped off the uphill side, or bent and broken downhill. The snow did that.
- Gullies and chutes. Terrain that funnels. A gully collects wind-loaded snow from both walls and concentrates the debris.
- Open bowls and cirques. Large unforested catchments above treeline.
- Debris piles. Old avalanche debris at the bottom of a slope: lumpy, dirty, full of broken branches and chunks that do not match the surrounding snow.
Two things worth understanding about trees. First, dense mature forest genuinely does anchor the snowpack and is a reasonable place to be. Second, “there are trees on it” is not the same as dense mature forest. Widely spaced trees, or young trees growing back in an old path, do not anchor anything, and being caught in a treed slope is worse than being caught in an open one because trauma against trunks is how open-slope survivability turns into a fatality. If you can ski or walk comfortably between the trees, the trees are too far apart to help you.
Terrain traps and what is above you
A terrain trap is a feature that turns a small avalanche into a fatal one. The avalanche itself might be nothing much, a slide that would tumble you 30 feet (9 m) and leave you sitting in the snow annoyed. The trap is what is waiting underneath.
- Gullies, creek beds and road cuts. Anywhere the debris has nowhere to spread out, so it piles deep. A slide that would leave you on the surface on an open slope buries you 10 feet (3 m) deep in a gully.
- Cliffs and steep drops below the slope. Trauma, not burial, is the killer here. This is why ice climbers have a trauma death rate four times that of snowmobilers.
- Trees, as above.
- Open water below the slope. A creek or lake edge at the bottom of the runout. Being swept into water in winter is covered in cold water immersion and it does not take long to become unsurvivable.
- Flat benches where debris stops and deepens. The debris decelerates and piles rather than thinning out.
The habit that terrain traps should build is a simple question, asked constantly: what is above me, and what is below me? Most people, walking on flat ground, never look up. In winter the ground you are standing on is a small part of the problem. A valley trail underneath a 40-degree slope is avalanche terrain even though the trail itself is flat, and the fact that you cannot trigger the slope from where you stand is only half reassuring, because natural releases happen and because someone else’s party may be up there.
The red flags you can see for yourself
Forecasters call these signs of instability, and they are the observations that need no snow science at all. If you see any of them, the snowpack is telling you directly that it is unstable right now. Any one of them is enough to change the plan.
- Recent avalanche activity. Fresh avalanches on slopes of similar angle, aspect and elevation to the one you are considering. This is the strongest signal that exists. Nature has already run the test for you.
- Whumpfing. A deep hollow thud underfoot, sometimes felt as much as heard, as a buried weak layer collapses under your weight over a wide area. This is the sound of the exact mechanism that produces a slab avalanche, happening on ground flat enough that it cannot slide. On a steeper slope it would have.
- Shooting cracks. Cracks that shoot out ahead of or away from your foot across the snow surface, sometimes for many feet. That is the slab telling you it is cohesive and poorly bonded.
- Heavy recent snowfall. Roughly 12 inches (30 cm) or more in 24 hours is a widely used threshold for a significant spike in danger. The snowpack needs time to adjust to a new load, usually a day or two.
- Wind loading. Blowing snow off ridge crests, drifting, and firm hollow-sounding snow underfoot on lee slopes. Wind can build a slab in hours without a cloud in the sky.
- Rapid warming or rain. A sharp rise in temperature, strong sun on a slope that had been cold, or any rain on snow. Rain is the worst of these: it adds load and destroys bonds at the same time.
These signs are reliable when present and useless when absent. A quiet snowpack with no whumpfing and no recent activity can still be holding a persistent weak layer that will propagate the moment you find the thin spot. Red flags can tell you to turn around. They cannot tell you to proceed. That asymmetry is the whole reason the forecast matters.
Reading a public avalanche forecast
Both Canada and the US publish free daily forecasts covering most of the terrain recreational users visit. Avalanche Canada covers much of the Canadian backcountry, with Parks Canada issuing forecasts for the mountain national parks. Avalanche.org, a partnership between the American Avalanche Association and the US Forest Service National Avalanche Center, aggregates the regional American forecast centres onto one national map.
Read the forecast the day you go, not the day before. Read it in this order:
- The danger rating, by elevation band. Forecasts rate three bands separately: alpine, treeline, and below treeline. It is common for the alpine to be rated Considerable while below treeline is Moderate. Know which band your route is in, and note that a route can climb through two of them.
- The avalanche problems. This is the part most people skip when they shouldn’t. Each problem comes with the aspects and elevations it applies to, usually as a rose diagram: a circle divided into compass directions with the dangerous sectors shaded. If the problem is wind slab on north through east aspects above treeline, that is a precise instruction about which slopes to stay off, and it leaves a great deal of terrain available.
- The likelihood and size for each problem. A problem that is unlikely but would produce a very large avalanche deserves different respect than one that is likely but small.
- The forecaster’s discussion. The plain-language section where the forecaster explains their confidence and what they are uncertain about. Low forecaster confidence is itself information.
- The weather forecast attached to it. Conditions change during the day, particularly with sun and warming. Pair this with backcountry weather for reading the wider picture.
Where there is no forecast at all, which is true of a great deal of country in both nations, you do not get to substitute optimism. Treat unforecast terrain as requiring either training and a conservative margin, or complete avoidance of avalanche terrain. The second option is the honest one for many readers of this site.
The danger scale, and why “Considerable” kills the most
The North American Public Avalanche Danger Scale has five levels, used identically in both countries.
- 1. Low. Generally safe avalanche conditions. Watch for unstable snow on isolated terrain features. Natural and human-triggered avalanches unlikely. Small avalanches in isolated areas or extreme terrain.
- 2. Moderate. Heightened avalanche conditions on specific terrain features. Evaluate snow and terrain carefully; identify features of concern. Natural avalanches unlikely, human-triggered avalanches possible.
- 3. Considerable. Dangerous avalanche conditions. Careful snowpack evaluation, cautious route-finding and conservative decision-making essential. Natural avalanches possible, human-triggered avalanches likely.
- 4. High. Very dangerous avalanche conditions. Travel in avalanche terrain not recommended. Natural avalanches likely, human-triggered avalanches very likely.
- 5. Extreme. Avoid all avalanche terrain. Natural and human-triggered avalanches certain. Large to very large avalanches in many areas.
Two things about this scale are routinely misread.
The first is that the levels are not evenly spaced. Danger increases roughly exponentially between them. The step from Moderate to Considerable is not one notch of “a bit more careful”; it is a large jump in both the likelihood of triggering something and the probable size of what you trigger.
The second is the one that should change your behaviour. Avalanche Canada states plainly that historically the highest number of avalanche fatalities have occurred when the danger was rated Considerable. Not High, and not Extreme. This is not because Considerable is more dangerous than High in any physical sense. It is because at High and Extreme people stay home, and at Considerable they go out and apply judgment. Considerable is the level where human-triggered avalanches are likely and where the terrain still looks perfectly inviting, and it is the level where good parties talk themselves onto a slope.
The practical rule for anyone without training: Considerable means avalanche terrain is off the menu. That is not timidity, it is reading the accident record correctly.
How big is big: the size scale
Forecasts describe avalanche size on a destructive scale from D1 to D5, and the definitions are written in terms of what the avalanche can do to you rather than in tonnes.
- D1. Relatively harmless to people. Not big enough to bury a person, but entirely capable of knocking you off your feet and carrying you into a terrain trap, over a cliff, or into a creek.
- D2. Could bury, injure or kill a person. This is the size that kills most recreational users, and it is not an impressive-looking avalanche.
- D3. Could bury or destroy a car, damage a truck, destroy a small building, or break a few trees.
- D4. Could destroy a railway car, a large truck, several buildings, or a substantial amount of forest.
- D5. Could gouge the landscape. The largest avalanches known.
The number worth memorising is D2. People form a mental picture of an avalanche as a D4, decide that nothing they are looking at could possibly do that, and proceed. The avalanche that kills you is a modest slide on a modest slope that puts you under 3 feet (1 m) of set concrete, or against a tree.
Planning a route that avoids avalanche terrain
This is the section that does the most good, because it is the work you do at home where nobody is cold, tired, or keen to get to the summit.
Start with the terrain, not the conditions. Terrain is fixed; conditions change daily. A route that never enters avalanche terrain is safe from avalanches in every forecast, which is an extraordinarily useful property and the reason this ordering matters.
Use a terrain rating if one exists. Parks Canada developed the Avalanche Terrain Exposure Scale (ATES), which classifies a route or area into three published classes by how much avalanche terrain it exposes you to:
- Simple (green). Exposure to low-angle or primarily forested terrain, generally under 30 degrees, with minimal terrain traps. Some forest openings may involve the runout zones of infrequent avalanches. Many options to reduce or eliminate exposure.
- Challenging (blue). Mostly low-angle ground but with isolated slopes over 35 degrees, mixed trees and open terrain, and some gullies, depressions or overhead avalanche terrain. Exposure to well-defined avalanche paths, starting zones or terrain traps, with options to reduce or eliminate exposure through careful route-finding.
- Complex (black). Large expanses of open terrain with a high proportion over 35 degrees, isolated tree bands, and many gullies, cliffs, cornices and hidden slopes above gullies. Frequent exposure to multiple overlapping avalanche paths, with minimal options to reduce exposure.
Many popular routes in the Canadian mountain parks carry a published ATES rating, and the scale has been adopted well beyond Canada. Without training, Simple terrain is where you belong, and there is a great deal of it.
Build the route on a map with slope shading on. Trace your intended line and look for two things: where it crosses the 30 to 45 degree band, and where it passes underneath that band. Both count. Then look at aspect, because the forecast will tell you which aspects potentially pose a problem, and note where your route swings onto a north or east-facing slope.
Plan the bailouts too. The retreat is part of the route. A descent line that drops down a gully because it is quicker is a decision you should make in the morning, not at 4 p.m. in fading light.
Check the daylight. Winter routes run out of light long before you expect. Working backwards from sunset is covered in winter hiking, and it matters here because rushing is how good terrain decisions get abandoned.
Travel protocol when you cannot avoid it entirely
Some routes have one unavoidable exposed section: a crossing below an open slope, a short traverse, a road cut. If you are trained and have decided to accept that exposure, the protocol below reduces the consequences. If you are not trained, the correct response to an unavoidable exposed section is a different route.
- Cross one at a time. Only one person in the exposed area at any moment. This is the most important habit on the list, because it means a burial leaves a functioning rescue party rather than a group of buried people. Parties who lose everyone at once, lose everyone.
- Move from safe spot to safe spot. Identify where you are going before you leave: dense mature trees, a ridge crest, a rise on the far side that is out of the runout. Not “the middle of the slope where it flattens a bit”.
- Watch the person crossing. The watcher’s job is to keep eyes on them the entire way and, if the slope releases, to track their last seen point: the final place you saw them before the snow covered them. That point is where the search starts, and it is the difference between a five-minute search and a thirty-minute one.
- Regroup out of the runout. Not at the bottom of the slope. Out of the path entirely.
- Spread out on the approach. Even on lower-angle ground below a suspect slope, spacing reduces the load you put on any one part of the snowpack and limits how many people one slide catches.
- Undo your hip belt and sternum strap. A pack that you can shed is a pack that does not pin you. The same reasoning applies at river crossings.
- Take wrist loops off your poles. Poles anchored to your wrists in moving debris drag you down and injure you. This is one of the few places where the normal pole habits reverse.
The human factor: how good parties talk themselves into it
The uncomfortable finding in avalanche research is that training and experience do not straightforwardly reduce accidents, and in some conditions they make decisions worse. Ian McCammon analysed more than 700 recreational avalanche incidents and found consistent patterns of decision-making that he called heuristic traps: mental shortcuts that serve us well in ordinary life and fail badly in avalanche terrain. They are usually remembered with the acronym FACETS.
- Familiarity. Parties in terrain they know well take more risk than parties in new terrain, and the effect is strongest among the most experienced. The slope you have skied thirty times has a different snowpack today, but it does not feel like it does.
- Acceptance. Doing something because it will get you noticed or approved of by people you like or respect. This has a measurable effect and it is strongest in mixed groups.
- Consistency. Having decided in the morning to do the route, later decisions get bent to stay consistent with it. The plan acquires false authority, and evidence that contradicts it gets discounted.
- Expert halo. Deferring to the strongest skier or the most experienced person in the group on an avalanche question, when strength and experience are not avalanche knowledge. Informal leaders emerge on qualities that have nothing to do with snow.
- Tracks, or social facilitation. Seeing tracks on a slope and reading them as evidence it is safe. They are evidence that someone else went there, nothing more, and a slab can take several passes before it releases. The presence of other groups also makes parties bolder.
- Scarcity. Competing for a limited resource: the last powder slope, the only good weather window, the trip you drove six hours for. Scarcity makes people accept risk they would refuse on an ordinary day.
The countermeasure is not to be smarter in the moment, because the moment is exactly when these are operating. It is to make the decisions in advance, and to give someone in the party explicit permission to invoke them. A group where the least experienced member can say “I want to turn around” and have that end the discussion is safer than a group of experts where nobody wants to be the one who spoiled it.
If you are caught
This section is short because your options are few and the time is measured in seconds. Avalanche Canada’s sequence, in order:
- Shout. Yell “AVALANCHE!” so the rest of the party sees you and can mark your last seen point.
- Try to get off the slab to the side. Move across and down at roughly 45 degrees, toward the edge of the moving snow. The edges move more slowly than the middle. This works in the first moments or not at all.
- Try to self-arrest if you are near the top. Drive poles, hands, or an ice axe into the bed surface beneath the moving snow. Self-arrest technique is covered in difficult terrain.
- Grab a tree. If one is within reach, hold it or shelter on the downhill side. People have survived by hanging onto a trunk while the slope went past them.
- Get rid of gear. Skis, board and poles increase injury and drag you down. A pack is a harder call, because it adds bulk that helps keep you up and protects your back, and if it holds an airbag it stays on.
- Deploy your airbag if you have one. Immediately. Deployment failure by the user is the single most common reason airbags do not work.
- Fight to stay on the surface. Swimming motions, pushing off blocks, whatever keeps you up. Burial depth determines survival more than almost anything else, so every inch you stay up is worth having.
- As it slows, make an air pocket. One hand clearing space in front of your mouth and nose, the other punched toward the surface. This is the last useful thing you can do and the window for it is about one second. Debris sets hard the moment it stops.
Once you are buried and the snow has set, there is nothing more to do. Do not exhaust yourself shouting, because snow deadens sound almost completely and rescuers on the surface will not hear you until they are very close. Slow your breathing and wait. Your party is the rescue.
Companion rescue: the ten minutes that matter
Here are the stats that make everything else in this article urgent.
Avalanche Canada puts it plainly: you have about 10 minutes during which the odds of recovering a buried person alive are around 80 percent, and after that the chances drop steeply. The Swiss data, which produced the classic survival curve, shows survival above 91 percent through the first 18 minutes and then a precipitous fall to about 34 percent by 35 minutes, as asphyxia takes the people who did not have an air pocket. Canadian research comparing the two countries found the Canadian curve drops faster at the early stages, attributed to denser coastal snow and a higher rate of trauma, which is why the Canadian guidance uses the shorter 10-minute figure.
Now compare that to organised rescue. A helicopter with a rescue team, on a good day, in good weather, with a working satellite messenger call placed immediately, is an hour away at best and often several. Ground teams are slower. Every buried person recovered alive by an outside agency is a rare and lucky exception. Organised rescue is a body recovery service for avalanche burials. That sounds harsh but it is the most important sentence here, because it explains why rescue gear only counts if every single person in the party carries it and knows how to use it.
The sequence, condensed:
- Take charge. Somebody says out loud that they are running this. Rescue without a leader is six people doing four jobs badly.
- Check the scene. Is there more snow above that could release onto the rescuers? Post a lookout if you have the people. A second burial that takes out the rescuers ends everyone.
- Count heads and establish the last seen point. How many are missing, and where was each one last visible.
- Switch every transceiver to search. Every single one, including the people standing still. A transmitter left on in the search area swamps the signal you are hunting.
- Signal search. Move across the debris in a pattern until the transceiver picks up a signal, usually within 50 to 70 yards (45 to 65 m) for a modern unit.
- Coarse search. Follow the direction arrow and the decreasing distance reading, moving fast. Speed matters more than elegance here.
- Fine search. Within about 10 feet (3 m), slow down, take the transceiver close to the snow surface, and bracket the lowest reading in a cross pattern.
- Probe. Spiral out from the lowest reading, probing perpendicular to the snow surface at about 10 inch (25 cm) spacing, until you strike the body. It feels distinctly different from ground or rock. Leave the probe in place. It is your depth gauge and your target.
- Dig, and dig properly. Do not dig straight down at the probe. Step downhill from it by roughly one and a half times the burial depth and dig in toward the person, throwing snow to the sides. A vertical shaft wastes enormous effort lifting snow and leaves you no room to work on an airway. Rotate diggers often; this is brutally hard work.
- Treat. Clear the airway first, before extracting the rest of the body. Then handle as a hypothermia and trauma casualty per backcountry first aid and hypothermia, and call for evacuation via satellite messenger or PLB.
Read that list and notice how many discrete skills it contains. Then notice that you have ten minutes to execute all of them, in deep debris, in the cold, while terrified, for someone you love. That is why the course is not optional, and why practice sessions are mandatory.
The rescue kit, and what it does not do
The standard avalanche rescue kit is three items, and the rule is absolute: every member of the party carries all three, or the party does not enter avalanche terrain. One person with a transceiver in a group of four is worse than useless, because it creates the belief that the group is equipped.
- Transceiver. Also called a beacon. Transmits and receives on 457 kHz, an international standard, so any brand finds any other brand. Buy a modern three-antenna digital unit, which gives clean direction and distance readings and handles a buried person lying in any orientation. Wear it under an outer layer in its harness, switched on and transmitting, from the trailhead, not in your pack: packs get torn off.
- Probe. A collapsible pole, at least 8 feet (240 cm) and preferably 10 feet (300 cm), that assembles in seconds. It converts a transceiver reading into an exact location and depth. Searching without one means digging a very large hole in roughly the right place.
- Shovel. A metal-bladed avalanche shovel. Plastic blades snap in set debris, and that is not a theoretical failure. A folding entrenching tool is not an avalanche shovel, and neither is a snow-camping shovel with a small blade: the digging in an avalanche rescue is the longest and hardest part, and our entrenching tools guide carries this same caution for the same reason.
Airbag packs are the significant addition of the last two decades, and the evidence for them is real but less compelling than the marketing suggests. A large international study found that inflated airbags reduced adjusted mortality from 22 percent to 11 percent, and reduced the chance of critical burial from 47 percent to 20 percent. Halving mortality is a genuinely large effect. But note where it comes from: airbags work by keeping you nearer the surface, so they do nothing about trauma, and they do nothing once you are buried. The same study found a 20 percent non-inflation rate, and 60 percent of those failures were the user not deploying it. An airbag is not a licence to enter terrain you would otherwise decline. It is a small hedge against a bet on terrain you have already decided is acceptable.
There is one more piece of equipment and it is the important one. A transceiver you have not practised with is ballast. The skill degrades fast, so practise at the start of every season, in a beacon park if there is one near you, with a stopwatch running. If you cannot go from signal acquisition to a probe strike in under five minutes, you are not yet equipped.
Turn-back triggers, written down in advance
The single most effective safety practice is deciding, before you leave the car, what will end the day: agreed upon by everyone, and not subject to renegotiation at the moment it triggers, because that moment is when the heuristic traps are loudest.
A reasonable no-go default set for an untrained party:
- Danger rated Considerable or higher in the band we will travel in.
- Any red flag observed: recent avalanche activity, whumpfing, or shooting cracks.
- More than 12 inches (30 cm) of new snow in the last 24 hours.
- Rain on snow, or a rapid thaw.
- Any member of the party wanting to turn back, for any reason, without having to justify it.
- A time limit: at a set clock time we turn around wherever we are.
- Finding ourselves on or under a slope steeper than 30 degrees that we had not planned for.
That last one deserves emphasis. Discovering that your route has put you somewhere you did not intend makes your decision. The plan was the safety system, and you are now outside it.
Getting trained
Both countries run a two-day recreational entry course with no prerequisites, taught to a national standard.
- Canada: Avalanche Skills Training 1 (AST 1), administered by Avalanche Canada and delivered by providers across the country.
- United States: AIARE 1, taught to a common curriculum by more than a hundred providers.
Both cover terrain recognition, forecast use, trip planning and companion rescue, and both put you on a slope with an instructor, which is the part that cannot be read. Many regions also run free or low-cost avalanche awareness evenings, which are a genuinely useful first step but not a substitute for the field day.
If you take the course, take it with the people you actually go out with. Much of what fails in real accidents is group communication, and a party that learned avalanche safety together makes better decisions than a party of individually trained strangers.
Common mistakes
- Judging the slope you are on and ignoring the slope above it. Parties get caught standing on flat ground in a runout zone, which does not feel like avalanche travel at all. Before you stop for a break, look uphill and trace where snow would go if it released; if the answer is where you are standing, walk out of the path first.
- Reading tracks on a slope as proof it is safe. A slab can take several passes before someone finds the trigger point, and the tracks tell you only that someone went there. Assess the slope from the forecast, the aspect and the angle, as if the tracks were not there.
- Treating the danger rating as the whole forecast. The rating alone cannot tell you which slopes to avoid, so parties apply a single number to terrain that varies wildly. Read the avalanche problems and their aspect and elevation rose diagrams, and determine the specific aspects you are avoiding that day.
- Carrying rescue gear that only some of the party has. A partial kit buys the feeling of being equipped and none of the capability, because the person without a transceiver is the one you cannot find. Set it as a condition of the trip: everyone carries transceiver, probe and metal shovel, or the group picks non-avalanche terrain.
- Buying a transceiver and never practising with it. Under pressure the unpractised searcher wanders, and the ten-minute window closes during the learning. Run a timed burial drill at the start of every season and repeat it until you can go from first signal to probe strike in under five minutes.
- Digging straight down at the probe. A vertical shaft forces you to lift every shovelful and leaves no room to reach an airway, which can double the extraction time. Step downhill from the probe about one and a half times the burial depth and dig in toward it, clearing snow to the sides.
- Going anyway because of the drive. Having committed money, fuel and a day off, parties accept conditions they would refuse on a local outing. Plan a Simple-terrain alternative for the same trailhead before you leave home, so the fallback is a real trip rather than an admission of defeat.
- Assuming trees mean safety. Widely spaced or young trees anchor nothing, and being carried through them adds trauma to burial. Use the spacing test: if you could walk or ski comfortably between them, treat the slope as open.
- Believing an airbag changes which terrain is acceptable. It roughly halves mortality but does nothing for trauma and nothing once you are buried, so it cannot upgrade a slope you would otherwise decline. Choose terrain as though you were not wearing one, and practise the deployment handle until pulling it is reflex.
What to carry
For a winter day that stays entirely in non-avalanche terrain, the carry list is the one in winter hiking: flotation or traction for the snow you expect, insulation for stopped time, and the navigation and communication gear that a short winter day demands.
If your route enters or passes beneath avalanche terrain, add the three rescue items for every member of the party: a three-antenna 457 kHz transceiver worn under a layer, a probe of at least 8 feet (240 cm), and a metal-bladed avalanche shovel. An airbag pack is an optional addition on top of those, never a replacement for them.
We do not currently review avalanche transceivers, probes, avalanche-specific shovels or airbag packs, so we are naming the categories here rather than pointing you at a product. Buy these from a shop that will let you handle them, ideally the shop attached to the course you are taking, and buy the transceiver new: it is a radio with a battery-powered transmitter whose service history you cannot verify second-hand.
The winter kit we do have field reviews for, and that belongs on the same trip:
- Flotation and traction. The MSR Evo Trail for rolling terrain, the MSR Lightning Ascent where the ground steepens, the traditional GV Huron for deep snow in trees, and Kahtoola MICROspikes or EXOspikes for frozen trail.
- Communication. A Garmin inReach Mini 2 or SPOT X, or an ACR ResQLink PLB. For an avalanche burial these summon the evacuation, not the rescue, but the distinction matters only to the buried person: everyone else on the trip still needs to get out.
- Light. A Black Diamond Spot 400 or Petzl Swift RL, because a rescue that starts at 3 p.m. finishes in the dark.
- Warmth for the casualty and for the waiting. Covered in staying warm through a cold night and what to wear in the bush.
Key takeaways
Avalanches almost never just happen to people who respect the rules as outlined above. More than 90 percent of fatal avalanches are triggered by the victim or their own party, which means the hazard is one you choose to enter and can therefore choose to decline. Nearly all of them are slab avalanches: a cohesive sheet of snow sitting on a buried weak layer, releasing all at once across a slope, moving at highway speed within seconds, and setting like concrete when it stops. About 96 percent release on slopes between 30 and 50 degrees, so slope angle is the one measurement that reliably separates avalanche terrain from everything else. Learn to see that band on a map and on the ground, and remember that standing below it counts as being in it, because runout zones extend far onto flat ground.
Read the forecast the day you travel, and read past the danger rating to the named avalanche problems and the aspects and elevations they apply to. Take the red flags seriously when you see them and do not take their absence as permission, because a persistent weak layer gives no surface sign at all. Understand that Considerable is the rating under which the most people die, not High, because that is the day terrain looks fine and confidence is relied upon too easily. If you are caught, fight to the side, get rid of gear, deploy an airbag if you have one, and make an air pocket as the snow slows, and then accept that the rest is up to your party. They have roughly ten minutes at 80 percent odds, which is less time than any outside agency can reach you in, so every member carries a transceiver, probe and metal shovel or the party stays out of avalanche terrain.
Most of all, decide in advance. Agree upon turn-back triggers, choose Simple terrain while you are untrained, plan a non-avalanche alternative for every trip, and give the quietest person in the group an unconditional veto. The parties that get caught are rarely ignorant. They are parties that made a good plan and then let a familiar slope, a sunk cost, or a set of tracks talk them out of it. Ensure you take the course, because the gap between reading this and being able to use it on a cold slope with someone buried is considerable.
Fatality figures follow ten-year averages published by the Colorado Avalanche Information Center and Avalanche Canada. Slope-angle distribution follows published analysis of the Swiss avalanche dataset. Cause-of-death proportions follow a 21-year review of 204 avalanche fatalities in British Columbia and Alberta. Survival-by-burial-duration figures follow Avalanche Canada’s companion rescue guidance and published Swiss and Canadian survival-curve research. Airbag effectiveness figures follow a multi-country retrospective study of avalanche accidents involving airbag users between 1994 and 2012. The danger scale, avalanche problem types and destructive size classes are the North American standards published by Avalanche Canada and Avalanche.org; the Avalanche Terrain Exposure Scale was developed by Parks Canada. Heuristic traps follow Ian McCammon’s analysis of recreational avalanche incidents. This is general education and not a substitute for hands-on avalanche training.
Wilderness Experts is reader-supported. As an Amazon Associate we earn from qualifying purchases; when you buy through links on our site we may earn a commission at no extra cost to you. It never changes what we recommend.