
Wilderness knives explained: types, terms, and how to use one
A knife is the oldest and most useful tool a person can carry into wild country. It makes fire, food, shelter, and first aid possible, and a hundred small problems disappear the moment you draw one. But the world of knives is thick with jargon, full tang, Scandi grind, 1095, ferro-friendly spines, and it is easy to overspend on the wrong thing. This guide cuts through all of it: what the parts and terms mean, how the types differ, what a blade actually does in the bush, and how to pick and care for one.
There is no single “best” knife, only the right knife for how you travel and what you ask of it. A featherweight folder for trail lunches and a full-tang fixed blade for building a fire in the rain are both correct answers to different questions. Understand the handful of ideas below and you will be able to look at any knife and know, in seconds, what it is good for.
The jargon, decoded
Knife talk is full of shorthand, so we will start with it. Skim this field glossary now, then refer back to it as you read, the sections that follow explain each idea in more depth.
- EDC . Everyday Carry; the knife (usually a folder) you have on you at all times.
- Bushcraft , the skills of living and working in the wild; a “bushcraft knife” is optimized for carving and fire-making.
- Fixed blade / folder , a one-piece knife with no hinge, versus a knife that folds into its handle (see the first section below).
- Full / partial tang . How far the blade steel runs into the handle; the key strength distinction, and why a knife can or cannot be batoned (see the Tang section below).
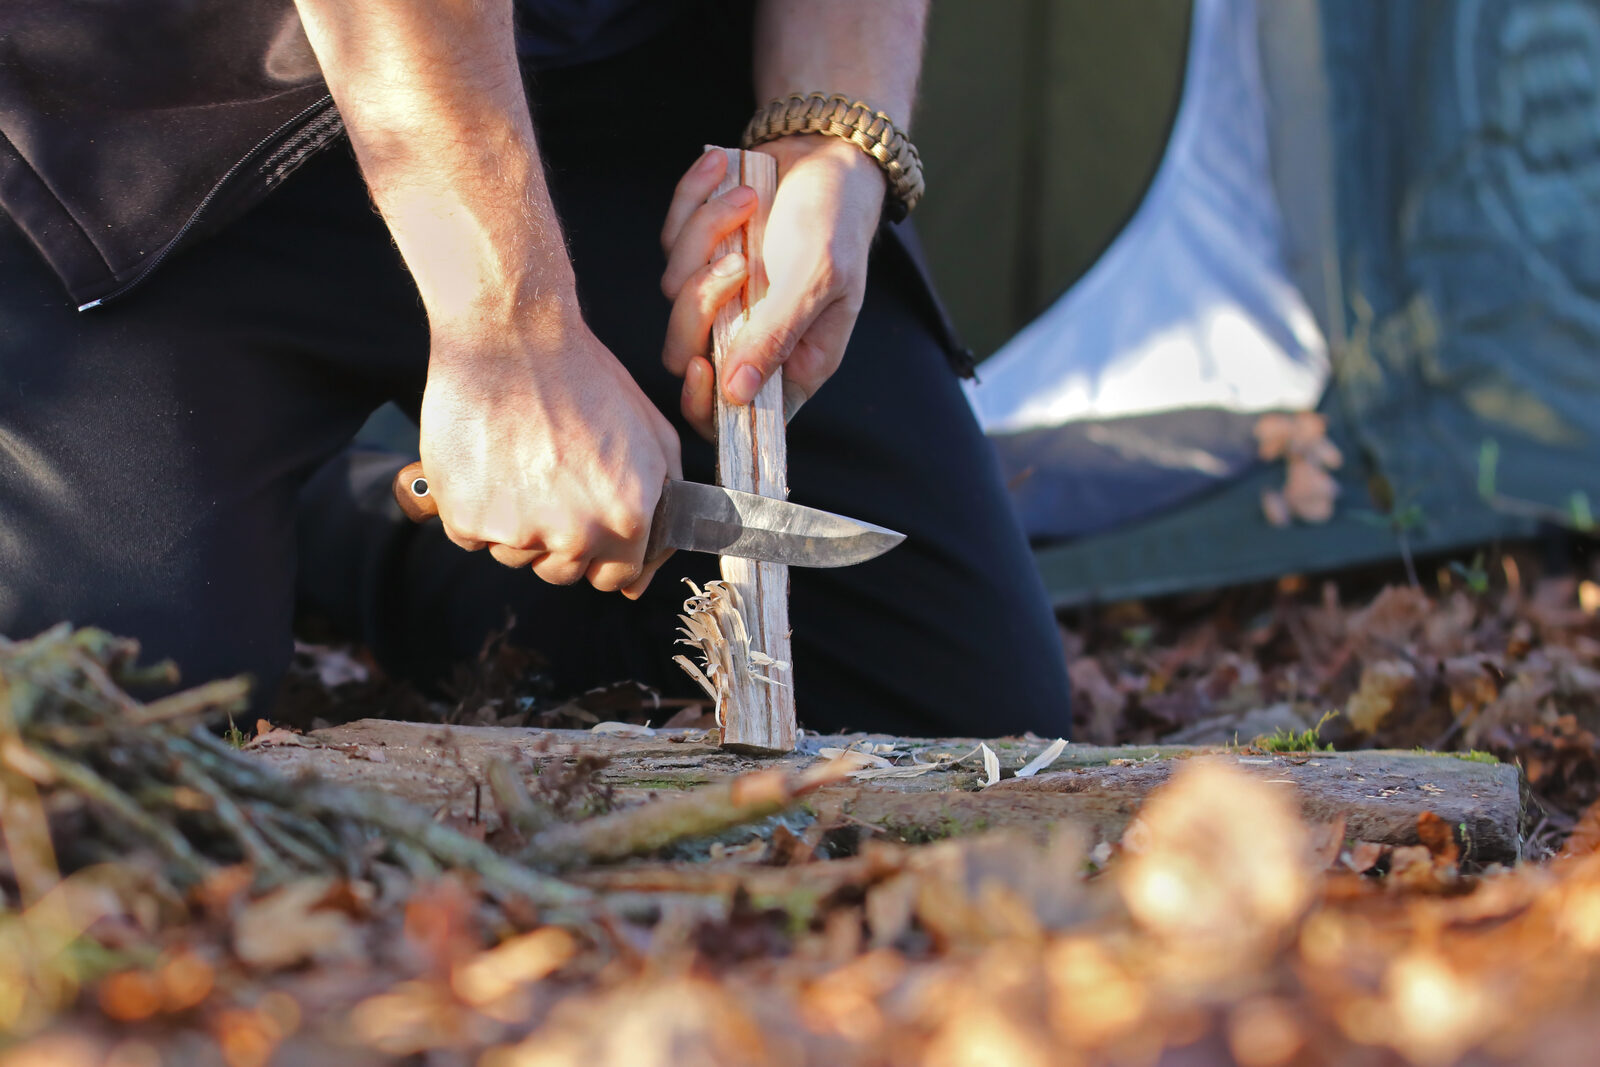
- Batoning , splitting wood by placing the edge on a log and striking the spine with a wooden baton, to reach dry inner wood and make kindling.
- Feather stick . A stick shaved into a fan of thin curls that catches a spark or flame even when the outside is damp; a core fire skill.
- Ferro rod , a ferrocerium rod that throws 3,000°C sparks when scraped with a square blade spine; the backbone of a no-lighter fire (see our guide to building a fire).
- Scandi grind . A wide, flat bevel that is easy to sharpen and excellent for carving wood (see Grinds below).
- Patina , the grey oxide layer carbon steel develops with use; protective, not damage.
- Micarta / G10 , tough composite handle materials (canvas or fiberglass in resin) that grip well when wet.
- 1095 / 12C27 / VG10 , common carbon and stainless blade steels; names, not grades.
- DLC , a diamond-like carbon blade coating for rust and glare resistance.
- HRC / Rc . Rockwell hardness; outdoor knives run ~56–59.
- Choil / jimping / ricasso , the finger notch, the spine grip-grooves, and the flat unsharpened blade base (see the anatomy section below).
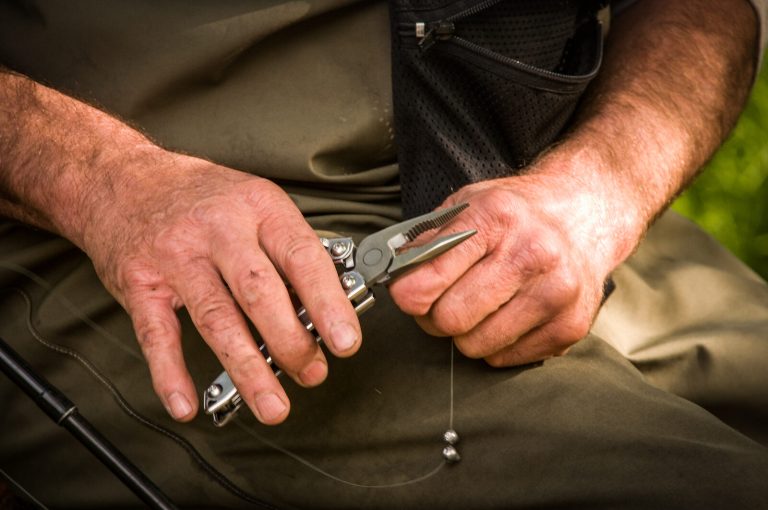
- Multitool , a folding tool built around pliers with a blade among many tools; complementary to, not a replacement for, a real knife (see the Leatherman Wave+).
Fixed blade vs. folding knife
The first fork in the road is whether the blade folds. A fixed blade is one solid piece: the steel runs from the tip into the handle with no hinge. It is stronger, safer under hard use, and easier to clean, which is why it is the traditional wilderness and bushcraft (wilderness-craft) knife. You can carve, pry a little, and split wood with it. The trade is that it is bigger, rides in a sheath on your belt or pack, and is not pocketable.
A folding knife (a “folder”) closes into its handle, so it disappears into a pocket for everyday carry. Modern folders lock open for safety, but the hinge is always the weak point and the pivot traps dirt, so a folder is a light-duty cutter, not a batoning tool. Most experienced backcountry travelers carry both: a fixed blade for real work and a folder for food and small tasks. If you only take one into serious country, make it a fixed blade.
Anatomy of a knife: the parts
Knife talk uses a lot of body-part words. Here is the map, tip to butt:
- Point / tip . The front end, for piercing and detail work.
- Belly , the curved part of the edge near the tip, where most slicing happens.
- Edge , the sharpened cutting side.
- Spine , the thick, unsharpened back of the blade. A crisp, square (90°) spine is what scrapes sparks off a ferro rod and shaves fine tinder.
- Grind / bevel . The way the blade is tapered down to the edge (more below).
- Ricasso , the flat, unsharpened section of blade just ahead of the handle.
- Choil , a small notch or finger cut-out between the edge and the handle; a finger choil lets you “choke up” for control.
- Guard , a lip that stops your hand sliding forward onto the edge.
- Tang , the part of the blade steel that extends into the handle (crucial. See below).
- Scales / handle , the grip, often polymer, rubber, wood, or Micarta/G10.
- Jimping , small grooves on the spine or choil for thumb grip.
- Lanyard hole / bail , a hole at the butt for a cord loop, so you do not drop it.
Tang: why full vs. partial matters
The tang is the single most important word for a wilderness fixed blade, because it determines what abuse the knife survives.
- Full tang . The blade steel runs the full length and width of the handle, with the grip scales bolted to either side. This is the strongest design: you can baton it through wood and lean on it without fear of the blade snapping off the handle. Look for it in a survival knife.
- Partial / stick / rat-tail tang . A narrower rod of steel runs into (but not fully through) the handle. This makes a lighter, cheaper knife that carves beautifully, but it is not built for hard batoning or prying, where impact can eventually stress the joint.
The classic budget bushcraft knife, the Morakniv Companion, is a partial-tang carver, superb for its job, but step up to a full-tang blade like the Morakniv Garberg or the ESEE-4 when you need to split wood and truly rely on the knife.
Blade steel: carbon vs. stainless
Blade steels split into two families, and the choice is a genuine trade-off, not a matter of “better.”
- Carbon steel (e.g. 1095, the classic survival steel) takes a very keen edge, is easy to re-sharpen in the field, and throws good sparks off a ferro rod. The catch: it rusts. Leave it wet or dirty and it corrodes, so you must wipe it dry and keep it lightly oiled. Over time it develops a grey patina . A stable oxide layer that is normal and actually helps resist deeper rust.
- Stainless steel (e.g. Sandvik 12C27, VG10) resists rust with far less care, the low-maintenance choice for wet climates, saltwater, and beginners. It can be slightly harder to get screaming sharp and (in most alloys) does not spark a ferro rod as well as carbon.
Steel names like 1095, 12C27, or VG10 are just recipes; the numbers are not a quality score. Two more terms you will see: DLC (a diamond-like carbon coating that helps a carbon blade resist rust and glare) and HRC or Rc (Rockwell hardness. How hard the steel is; most outdoor knives sit around 56–59 Rc, a balance of edge-holding and easy sharpening).
Rule of thumb
Choose stainless if you want the lowest-maintenance knife, hike in wet or coastal country, or are buying your first blade. Choose carbon if you want the keenest edge, easy field sharpening, and a blade that helps start a fire, and you will keep it dried and oiled.
Grinds and edges
The grind is how the blade is tapered from spine to edge. It sets how a knife cuts, carves, and sharpens:
- Scandi (Scandinavian) grind . A single, wide bevel that runs to the edge. It is the bushcrafter’s favorite: it bites into wood for carving and feather-sticking, and it is the easiest grind to sharpen by hand because you simply lay the bevel flat on a stone.
- Flat grind , tapers in a straight line from spine to edge; a strong all-rounder that slices food and carves well. Common on survival knives.
- Hollow grind . A concave bevel that gets scary sharp for slicing but is thinner and weaker at the edge; more a hunting/skinning grind than a chopping one.
- Convex grind . A rounded, axe-like taper that is very strong behind the edge for chopping and batoning, but trickier to sharpen (a “strop and sandpaper” job).
Blade shapes and sizes
Two blade profiles cover most wilderness knives. A drop point has a strong, controllable tip that drops below the spine. The safe, do-everything shape for carving, food, and general work. A clip point has a finer, more upswept tip for piercing and detail. (A tanto, with its angular reinforced tip, is a tactical shape with little bushcraft advantage.)
On size, resist the urge to go huge. A blade of 3.5 to 5 inches (9 to 13 cm) is the sweet spot for the backcountry: long enough to baton small wood and prep food, short enough for fine carving and control. Big “Rambo” survival knives chop better but carve worse and carry heavier, for most tasks a mid-size knife plus a folding saw beats one giant blade.
What a knife does in the bush
A knife earns its place because it touches nearly every survival priority:
- Fire. Shave feather sticks and fine tinder, split kindling by batoning to reach dry wood, and scrape a ferro rod with the spine. A carbon blade with a square spine is a genuine fire-starting tool, the heart of our fire-building guide.
- Shelter and cordage. Cut and notch stakes and poles, trim cordage, and shape toggles and pot hooks for a shelter or tarp setup.
- Food. Prepare and portion food, clean fish and game, and carve simple utensils. See finding food in the wild.
- First aid. Cut bandages, tape, and clothing, improvise a splint, and open packaging one-handed when it counts.
- Everyday problems. The hundred small cuts, adjustments, and repairs that a trip throws at you, the reason a knife lives in the Ten Essentials.
Using a knife safely
A wilderness cut, far from help, is a real emergency, so technique matters as much as sharpness. (A dull knife is actually more dangerous: it skates instead of biting, so it slips.)
- Mind the blood circle. Before you cut, sweep an imaginary arc around you with your outstretched arm and knife. Keep people, and your own legs, outside it.
- Cut away from your body whenever possible, and never cut toward the hand holding the work. Brace the workpiece against a log, not your thigh.
- Carve with control. Use short, controlled strokes and let the grind do the work; for fine cuts, choke up on the choil and use your thumb to push the spine (a “chest-lever” or thumb-push cut).
- Baton correctly. Set the edge across the wood, strike the exposed spine with a wooden baton (never a rock or another blade), and stop if the blade binds. Do not twist a stuck blade hard enough to snap it.
- Sheathe it when not in use, and never hand someone an open blade tip-first, pass it handle-first or set it down.
Care and sharpening
A knife you maintain will outlast you. After use, wipe the blade clean and dry it fully . This is non-negotiable for carbon steel, which should also get a light film of oil before it goes away. Do not store any knife in a damp leather sheath, which holds moisture against the steel.
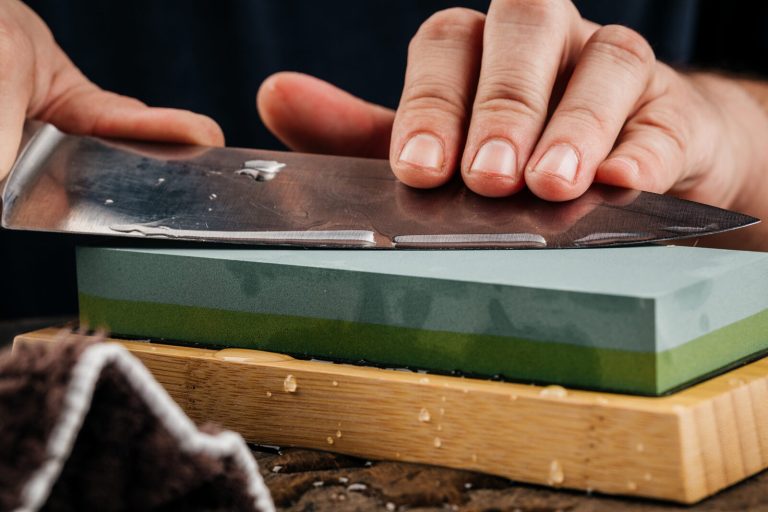
Keep it sharp with a small field stone or a strop; a few passes often is far easier than one big re-grind. The key is a consistent angle , roughly 20° per side for most outdoor knives, or, for a Scandi grind, simply lay the existing bevel flat on the stone and follow it. A quick strop on leather (or a belt) realigns the edge between sharpenings and keeps it shaving-keen. Sharpen before the knife feels dull, not after.
Choosing your knife
Match the knife to how you actually travel, using the ideas above. Our four reviewed blades map cleanly onto the common needs:
- First / budget fixed blade: the Morakniv Companion , a razor-sharp stainless Scandi carver for around the cost of lunch. The right starting point for almost everyone.
- Full-tang do-everything: the Morakniv Garberg . A carbon full-tang blade you can baton and spark a fire with, at remarkable value.
- Buy-it-for-life survival knife: the ESEE-4 . US-made 1095 with an unconditional lifetime warranty, for those who go far from help.
- Everyday folder: the Opinel No.8 , a light, elegant locking folder for food and small tasks, the knife anyone can carry.
Most people end up with a fixed blade for real work and a folder in the pocket. Start with a Companion and an Opinel, and upgrade to a full-tang blade as your skills and trips grow.
Carry it legally
Knife laws vary widely by country, state, and city, rules on blade length, locking mechanisms, and fixed vs. folding carry differ from place to place, and airports and some public spaces prohibit blades entirely. A knife that is legal on your home trail may not be where you travel. Check the local law before you carry, especially across borders and in towns.
Key takeaways
Strip away the jargon and a good wilderness knife comes down to a few choices: fixed or folding, full or partial tang, carbon or stainless, and a grind and size that match your work. Get those right and a mid-size, comfortable blade of decent steel will carve your fire, prep your food, and solve your problems for decades. Learn to use it safely, keep it dry and sharp, and carry the right one for your trip. Then go put it to work. Not sure where to start? Read our field reviews of the Morakniv Companion, Garberg, ESEE-4, and Opinel No.8.
Drawn from established bushcraft and field practice, including the knife-craft and fire sections of the U.S. Army Survival Field Manual (FM 3-05.70 / FM 21-76) and the SAS Survival Handbook, combined with modern outdoor-knife design.
Wilderness Experts is reader-supported. As an Amazon Associate we earn from qualifying purchases; when you buy through links on our site we may earn a commission at no extra cost to you. It never changes what we recommend.