
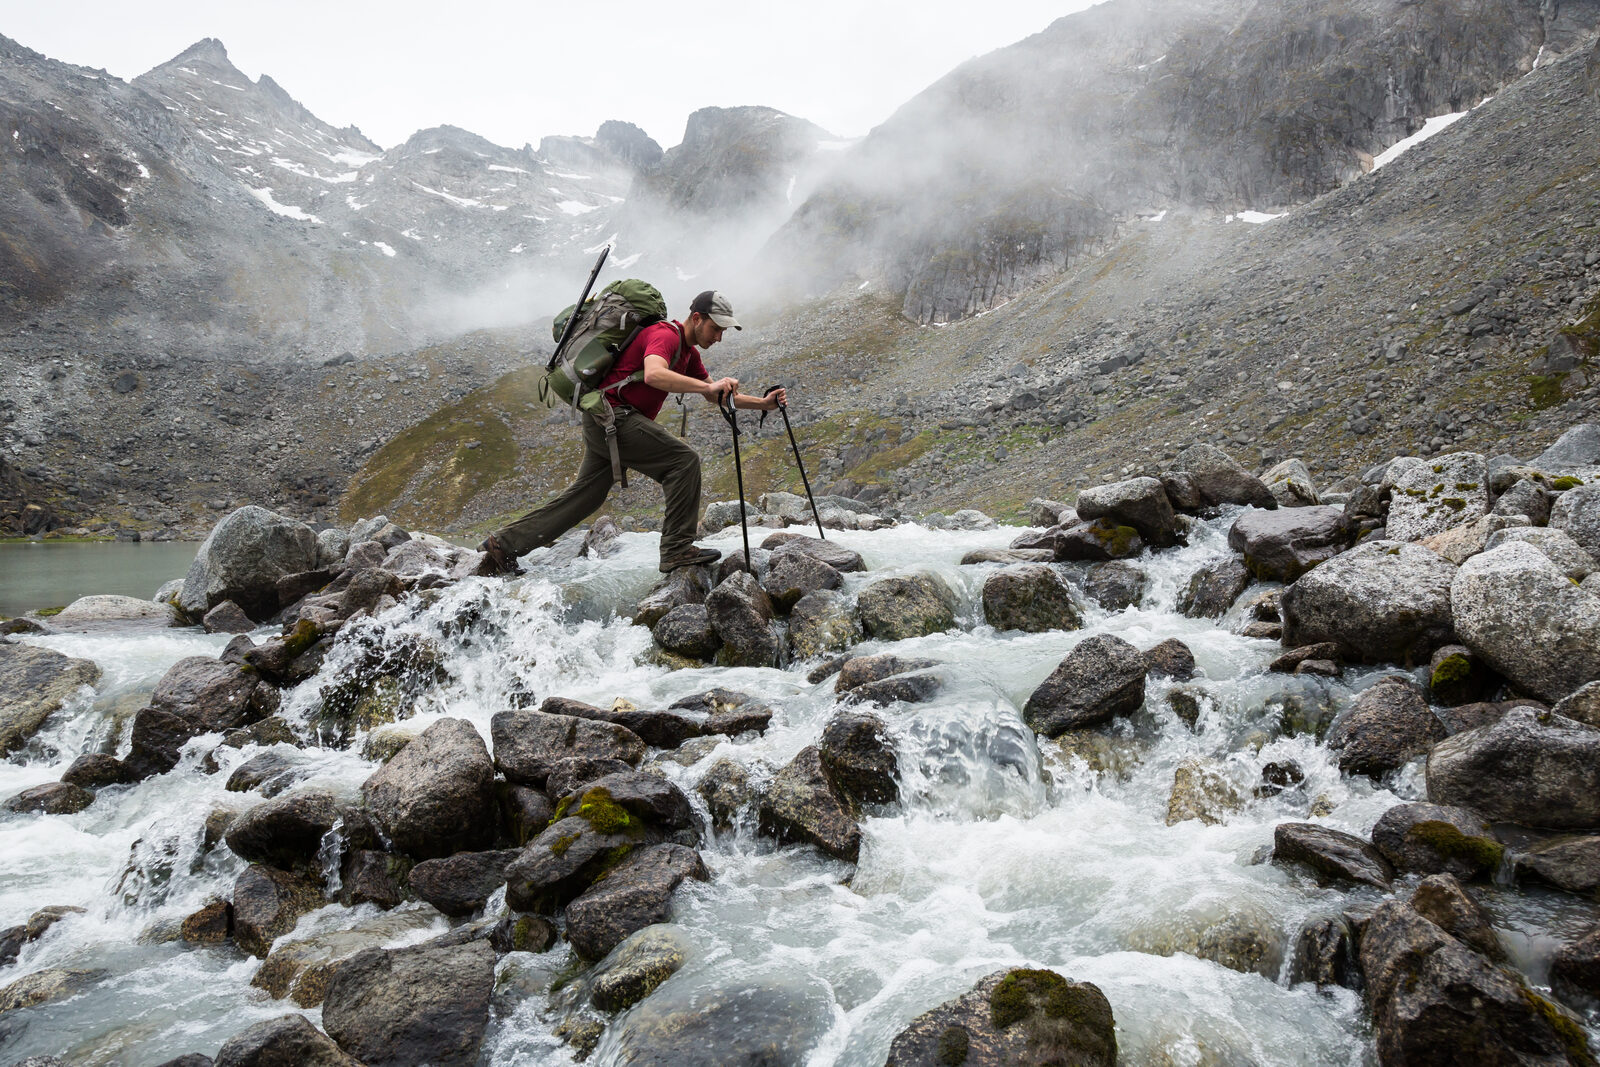
How to cross a river or stream safely
Moving water is the most consistently underestimated hazard in the backcountry. A stream that only reaches your knees can take your feet out from under you, cold water strips your strength within minutes, and a great many backcountry drownings happen at crossings that the party looked at and judged to be fine. This guide covers how to decide whether to cross at all, how to find and read the right place, the technique for crossing alone and in a group, and how to recognise the crossing you should simply walk away from.
One rule sits above everything else here: the crossing is optional and getting home is not. No summit, no campsite and no schedule is worth it. The most useful skill in this article is not a wading technique. It is the willingness to spend two hours walking upstream, or to turn around entirely, when the water in front of you says no.
Cold water is the hidden half of the hazard
Snowmelt and mountain streams often run just above freezing. Cold water steals coordination and grip strength within minutes, well before it threatens your core temperature, so the danger is not only being swept away but losing the ability to do anything about it. Treat any long immersion as a hypothermia risk, and see cold water immersion for what sudden entry does to your breathing and your ability to think.
Why crossings catch people out
Crossings are dangerous for a specific and slightly counterintuitive reason: the water does not look like what it can do. A stream you can see the bottom of, that comes to mid-thigh, that a group of confident adults is standing beside, presents almost no visual signal of the force running through it. People routinely misjudge it, and they misjudge it in the direction of stepping in.
The physics is the part worth internalising, because it explains why judgment by eye fails. The force water exerts on you rises with the square of its speed. Water moving twice as fast does not push twice as hard, it pushes roughly four times as hard. Add depth, which increases the area the current is working against, and a modest-looking increase in either can double or triple the load on your legs. This is why a crossing that was straightforward yesterday can be genuinely lethal today after rain, with the level only slightly higher.
The other trap is commitment. A crossing gets harder in the middle, which is exactly where turning back also becomes hardest, and where a party is most likely to keep going because retreating feels as risky as continuing. That is why nearly all of the useful decision-making happens on the bank, before anyone is wet.
The first decision: cross at all?
Before you assess the crossing, assess the need. Ask what happens if you simply do not cross, and be honest about the answer. Frequently the alternatives are better than they first appear: a longer route on this side, a bridge a few miles away, a different objective, waiting until morning, or turning around and coming back another time. Trips have been ruined by crossings; they have rarely been ruined by not crossing one.
Consider also what the crossing commits you to. A river that is passable now and rising means you may not be able to get back, and a party stranded on the far side by an afternoon’s melt or an evening’s rain is a common way for a day trip to become a night out. If the crossing is one-way in practice, treat it with the seriousness of a one-way decision, and make sure someone knows via your trip plan that it is on your route.
Where major crossings are known in advance, research them before you go: recent flow gauges, park or ranger reports, trip reports from the last few weeks, and the season’s snowpack. A river is a scheduled hazard far more often than a surprise one, and the information usually exists.
Timing: the same river, twice the danger
Mountain rivers are not constant, and knowing their rhythm is one of the cheapest safety gains available.
Snowmelt rivers run lowest in the early morning and highest in the late afternoon and evening. The sun melts snow through the day, that water takes hours to reach the valley, and the peak arrives long after the melting started. A crossing at seven in the morning can be a different proposition entirely from the same crossing at five in the afternoon. If a big crossing is on the route, plan the day so you reach it early, even if that means camping short of it the night before and crossing at dawn.
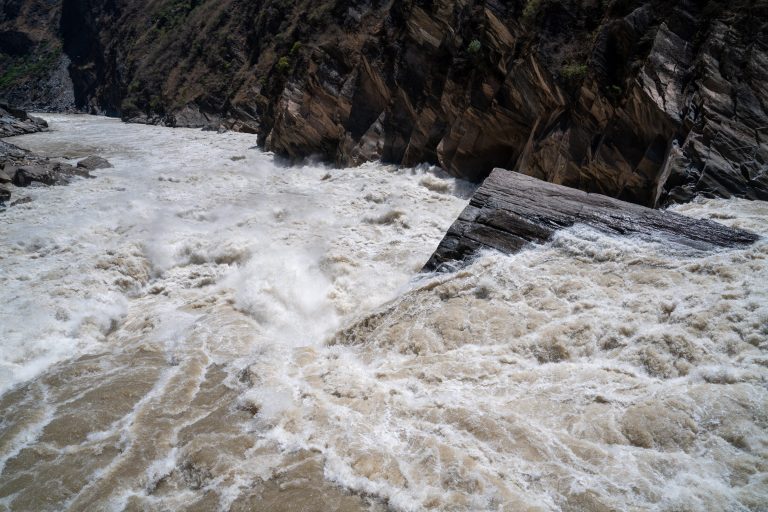
Rain arrives late and stays a while. A river responds to rainfall in its whole catchment, most of which you cannot see, so it can rise sharply hours after the weather has cleared where you are standing. Clear skies overhead are not evidence that the river is safe. Watch for water that is louder, browner, or carrying debris, all of which mean it is rising.
Season matters as much as time of day. Late spring and early summer, when snowpack is melting hard, is when otherwise minor streams become serious and when most crossing incidents occur. The same channel in September may be a boot-hop.
If a crossing is marginal, waiting is a legitimate tactic. Overnight, a snowmelt-fed river often drops substantially. Camping and crossing at first light costs you an evening and removes most of the risk.
Scouting for the right place
Almost never cross where the trail meets the river. That point was chosen for the convenience of the path, not for the safety of the water, and there is very often a better crossing within a short walk. Put the packs down and scout both directions along the bank before committing to anything.
What you are looking for:
- Wide, shallow and slow beats narrow, deep and fast. The same volume of water squeezed into a narrow channel moves faster and hits harder. A broad braided section where the river splits into several small channels is usually the best crossing on the reach, because you take the current in manageable pieces with rest between them.
- A clean run-out downstream. This is the most important criterion and the most often ignored. Ask where the water would take you if you slipped, and go and look. Calm, shallow water and an easy bank downstream mean a fall is a swim. Rapids, a logjam, a boulder sieve or a waterfall mean a fall is something much worse.
- A bottom you can walk on. Gravel and firm sand give grip. Large slick boulders, deep silt and bedrock slabs do not.
- Banks you can get out on, on both sides. Check the exit before you start. Undercut or steep far banks have stranded plenty of people mid-river.
- The inside of a bend, not the outside. The current runs fastest and the channel is deepest on the outside of a curve, and the inside is where gravel bars form.
Never cross above a hazard
Do not enter the water upstream of rapids, a waterfall, a logjam or strainer, or a boulder sieve, no matter how easy the crossing itself looks. A strainer lets water through and holds a body against it, and it is the single most lethal feature in moving water. If there is one below your crossing, that is not your crossing. Move.
Reading the crossing
Once you have a candidate, read it properly. Watch the surface for a couple of minutes before you touch it. Smooth, glassy water is often deep and fast; broken water over rocks is usually shallower but harder to walk. Standing waves mean speed.
Depth. As a working guide, water above the knee in any real current is serious, and water above mid-thigh in fast current is dangerous for most people. The precise numbers matter less than the interaction: shallow water moving fast can be more dangerous than deeper water barely moving.
Speed. Throw a stick in and walk alongside it. If you have to walk briskly to keep up, the current is faster than it looks. A useful test is whether you can hear it: water pushing loudly over rocks is carrying real energy.
The wade test. Step in at the edge, facing upstream, and feel what the water does to your legs before you commit to the channel. If it is already working hard on you at ankle or shin depth near the bank, the middle will be much worse. This is a genuine test and it is free, provided you do it at the edge with a clean run-out.
Clarity. If you cannot see the bottom, you cannot plan your foot placements and you cannot see the hole or the boulder that will stop you. Silty snowmelt is a reason to be more conservative, not less.
Setting up before you step in
A few minutes of preparation on the bank makes the difference between a fall and a drowning.
- Unbuckle your hip belt and sternum strap. This is the non-negotiable one. A pack that fills with water becomes heavy and will hold you face-down; you must be able to shed it in one movement. Undo them before you enter the water, every time, on every crossing, including the easy ones.
- Keep your shoes on. Bare feet slip, bruise and cut, and lost footing is the whole risk. Cross in your boots, or in camp shoes with a real sole if you would rather keep boots dry. Sandals with loose heels are worse than useless. Wet boots dry; a broken ankle mid-river does not.
- Reduce drag. Bare legs present much less resistance than fabric, so removing rain pants and even trousers is a legitimate technique on a serious crossing. It looks silly and it measurably reduces the force on you.
- Waterproof the things that matter. Insulation, sleeping bag, electronics and fire-starting kit go into dry bags inside the pack, on the assumption that the pack is going swimming. Loosen any chest pockets and stow anything that could snag.
- Plan the line and the exit. Pick your entry, your route across, and the specific point you are aiming for on the far bank, which should be downstream of your entry rather than opposite it. Agree it as a group before anyone moves.
- Post a spotter. Someone downstream on the bank, watching, ideally with a throwable line or a long branch, and clear about what they would do.
Crossing alone
Face slightly upstream and move across and downstream at an angle, working with the current rather than fighting it. Fighting directly across a strong current wastes strength you will need.
Shuffle, do not step. Slide your feet along the bottom rather than lifting them. A lifted foot gives the current a whole leg to push, and it is the moment most people lose balance. Keep both feet in contact and probe forward with the leading one.
Stay side-on where you can. Turning your body edge-on to the flow presents less surface for the water to work against, in the same way that bare legs do.
Use a third point of contact, and move one thing at a time. A pair of trekking poles or a stout stick planted upstream gives you a stable tripod. The rule that keeps you upright is that only one point moves at once: plant the pole, then move a foot, then the other foot, then the pole. Never move a pole and a foot together, because for that moment you have only one point of contact and the current is waiting for it. Our guide to trekking pole uses covers the technique in more detail.
Lean slightly into the current and keep your weight forward over your feet. Look at the far bank or at your hands rather than down at the moving water, which is disorienting and will make you feel like you are being swept when you are not. Move steadily, breathe, and do not rush the middle.
Crossing as a group
Two or more people can cross water that would be marginal for one, and a group also has the option of a rope-protected crossing that is beyond the scope of this guide and genuinely requires training. What follows works without special equipment.
In-line, linked. The party lines up parallel to the current with the strongest and heaviest person at the upstream end, each person holding the shoulder straps or the waist of the person beside them, forming a single unit. The lead breaks the current for everyone behind. Move together, slowly, on a spoken count, with the same one-point-at-a-time discipline. This works well in shallow to moderate water. Its limitation matters: in deep or genuinely fast water the line can break, and then several people are swimming instead of one. Use it where the water is manageable, not as a way to attempt a crossing that is beyond the group.
The huddle. Three or four people face inward gripping each other’s shoulder straps, forming a tight circle that rotates and shuffles across as a single mass. It is more stable than a line in deeper and faster water because there is no long axis to break, and it keeps everyone in contact. It is slower and it needs practice.
The tripod or wedge. Three people forming a triangle with the point upstream, arms linked, works well and is more stable than two abreast.
Whatever the formation, put the least confident person in the most protected position, never at the upstream end and never on their own. Cross one group at a time rather than everybody at once, so people on the bank can help. And decide in advance, out loud, what happens if someone goes down, because that is not the moment to be working it out.
If it goes wrong
Do not try to stand up in moving water. This is the instinct and it is what kills people. A foot that slides into a gap between rocks can be pinned by the current in water barely waist deep, and once your foot is trapped the flow pushes your body under and holds it there. Foot entrapment is one of the most common causes of death in moving water and it is entirely avoidable.
Instead, get onto your back at once, point your feet downstream and keep them at the surface so they fend off rocks rather than catching on them. Use your arms to backstroke at an angle toward the nearest bank or eddy, rather than fighting straight across. Ditch the pack if it is pulling you under, which is the whole reason the straps came undone before you entered. Keep your head up and look downstream so you can see what is coming.
There is considerably more to this, including which hazards to swim toward rather than away from, how to catch an eddy, and what to do in a hole. Read our full guide to being caught in whitewater before you attempt any serious crossing, ideally well before.
On the far side, deal with the cold immediately. Get out of wet layers, get insulation on, get moving or get a hot drink into people, and watch anyone who took a long immersion for the early signs of hypothermia, which are clumsiness, stumbling and poor decisions rather than dramatic shivering. Check feet before putting boots back on, and account for the whole party and all the gear before walking on.
Logs, snow bridges, and other special cases
Log crossings look safer than wading and frequently are not. A wet or mossy log is extremely slippery, a fall from height onto rock or into moving water is worse than a fall while wading, and you cannot self-arrest on a log. If you use one, it should be large, stable, dry, low over the water, with a clean run-out beneath, and you should straddle and shuffle rather than walk it if there is any doubt. Poles do not help much on a log; a spotter does.
Snow bridges over creeks are common in spring and are treacherous, because the stream hollows them out from beneath where you cannot see. They are strongest early in the morning after a cold night and weakest on a warm afternoon. Probe ahead, cross at the narrowest and thickest-looking point, spread the party out, and be aware that falling through into a creek under snow is a serious situation.
Fords on roads or established crossings are usually the best option available and are worth walking to.
Children and dogs. A child is far more affected by current than an adult and should be carried by a strong adult in a stable formation, or the crossing should not happen. Dogs generally swim and should be allowed to, without a lead that could snag; do not carry a dog across in a way that unbalances you.
Tidal channels and estuaries have their own trap, which is that they change with the tide rather than the weather. Know the tide table, and never cross an outgoing channel you could not swim.
When to walk away
Set the thresholds before you are standing in the noise with a tired party and a schedule. Walk away if any of these are true:
- The water is above mid-thigh and moving fast.
- There is a strainer, rapid, sieve or falls below the crossing.
- You cannot see the bottom or identify a clean exit on the far bank.
- The wade test at the edge already feels like hard work.
- The river is visibly rising, browner, louder, or carrying debris.
- Anyone in the party could not manage it alone, and the formation is the only thing making it possible.
- Crossing would leave you soaked, hours from shelter, in the cold or the dark.
- You are crossing only because turning back feels like failure.
Then use the alternatives. Walk upstream to a braided section, look for a ford or a bridge, wait for the morning, or reverse the route. A delayed trip beats a rescue, and it beats the other thing.
Common mistakes
- Crossing where the trail hits the water. That point was chosen for the path, not for you. Scout both directions first.
- Leaving the hip belt done up. The most consequential and most common error, and it takes three seconds to fix.
- Crossing barefoot. Grip is the entire game. Keep footwear on.
- Not looking downstream. The run-out matters more than the crossing itself.
- Crossing in the afternoon on a snowmelt river. The same channel is often far kinder at dawn.
- Lifting your feet. Shuffle. A lifted foot is an invitation.
- Trying to stand after a fall. Foot entrapment kills in water that looks survivable. Feet downstream, on your back.
- Using a group formation to attempt what the group cannot do. Linking arms makes a manageable crossing safer; it does not make a dangerous one safe.
- Committing because the party has already got wet. Sunk cost is not a reason to continue into deeper water.
What to carry
- Trekking poles. A pair of Black Diamond Trail poles is the single most useful crossing tool most people carry, and doubles for the rest of the trip.
- Footwear you can get wet. Either accept wet boots or carry camp shoes with a real sole.
- Dry bags. Insulation, sleep system and electronics packed on the assumption the pack goes in.
- Dry layers kept dry, including a spare base layer and socks for the far side.
- A way to warm someone up. An emergency bivvy and the means to make a fire or a hot drink.
- A satellite messenger on remote routes with committing crossings.
Plan your route with our Trip Planner
Key takeaways
Treat every crossing as optional, because getting home is not. Remember that the force of water rises with the square of its speed, which is why a river that looks only slightly higher can be several times stronger and why judging by eye fails. Scout both directions rather than crossing where the trail meets the water, and choose wide, shallow, slow water with a clean run-out downstream, never above a strainer, rapid or falls. Time it: snowmelt rivers are lowest at dawn and highest in the late afternoon, and waiting overnight often solves a marginal crossing for free. Before you step in, undo your hip belt and sternum strap every single time, keep your shoes on, reduce drag, and pick your exit point downstream of your entry. Face upstream, angle downstream, shuffle your feet, and move only one point of contact at a time. In a group, put the strongest person upstream and understand that a linked line helps in moderate water but can break in fast water. If you go down, never try to stand: get on your back with your feet downstream and swim at an angle to the bank. And walk away whenever the water is above mid-thigh and fast, the run-out is bad, or the only reason to cross is that turning back feels like failure.
Verified against U.S. National Park Service guidance on safe river crossings and standard swiftwater practice on formations, foot entrapment and defensive swimming, with the U.S. Army Survival Field Manual (FM 3-05.70 / FM 21-76), Chapter 16, “Water Crossings,” as background. Rope-protected crossings require hands-on training and are deliberately not covered here.
Wilderness Experts is reader-supported. As an Amazon Associate we earn from qualifying purchases; when you buy through links on our site we may earn a commission at no extra cost to you. It never changes what we recommend.