
Backcountry first aid: what to do in the first ten minutes
In town, the worst injury you can have is survivable because an ambulance is nine minutes away. In the backcountry it is nine hours, and the person standing closest to the casualty is the entire medical system for that whole stretch. This guide is about those hours. Not the diagnosis, not the clever improvisation, just the small set of things that decide whether someone lives, and the order to do them in.
The order matters more than the skill. Bleeding that nobody stopped is the leading preventable cause of death after injury, and an airway nobody opened and cold that nobody took seriously are the other two things a bystander can fix in the first minutes. Everything else, the broken ankle, the deep laceration, the burn, is a problem you can work on once those three are handled. This article covers the life threats and the decisions around them, and points to our deeper guides for each specific injury.
Why order beats knowledge
Watch an untrained person meet a bad injury and you will see the same failure every time. They go to the most dramatic thing they can see. A compound fracture with bone showing pulls every eye in the group, while the quiet dark stain spreading under the casualty’s jacket goes unnoticed for four minutes. Four minutes is enough.
Professionals do not solve this with more knowledge. They solve it with a fixed sequence they run every time, on every patient, regardless of what the scene looks like. The sequence exists precisely because your judgment is worst in the first minute, when adrenaline has narrowed your attention to a single frightening detail. A checklist you rehearsed at home does the thinking that your brain will not do at the time.
The sequence in this guide is the one used across wilderness medicine and battlefield care, simplified for someone with a trail kit and no training. Scene first, then massive bleeding, then airway and breathing, then everything else, with warmth running underneath all of it. Work it in order, out loud, and finish each step before you move to the next.
The order, memorized
Scene safe. Big bleeding. Airway. Breathing. Warmth. Then everything else. If you learn nothing else from this page, learn those six steps in that order and say them aloud when you arrive.
First: do not become the second casualty
Before you touch anyone, spend five seconds on the thing that hurt them. It is still there. A rescuer who runs into the same rockfall, the same current, the same lightning-exposed ridge doubles the problem and removes the one person who could have solved it.
Look for what caused the injury and whether it is ongoing. Loose rock above a slope, a river that is still moving, a tree that is still falling, a fire, an animal that has not left, a storm cell that is still overhead. If the hazard is active, either move the casualty or wait. Moving someone with a possible spinal injury is a real risk, but it is a smaller risk than being hit by the second rock, and that trade is almost always worth taking.
Count your group while you are at it. In falls and rockfall and swiftwater there is often more than one person hurt, and the one who is screaming is rarely the one who is dying. A person who is quiet may be unconscious. Look at everyone before you commit to a casualty.
If lightning is the hazard, note that the usual rule reverses: the casualty carries no charge and is safe to touch immediately, but the group is still standing in the strike zone. Our guide to lightning safety covers what to do with the rest of the party while you work.
The ninety second check
Once the scene is safe, you need a picture of the casualty fast. Do not undress them, do not take a history, do not look for the fracture yet. You are asking one question: is anything killing this person right now?
Start by speaking to them. “Are you okay? Can you tell me your name?” A person who answers clearly has, in that single sentence, told you their airway is open, they are breathing, enough blood is reaching their brain to form words, and they are oriented. That is four of the big five, answered in two seconds, without you touching them.
Then run your hands over them. Start at the head and work down, and sweep under the body as well as over it, because blood soaks into ground and clothing where you cannot see it. Check your palms every few seconds. In poor light, dark clothing, or on wet rock, sight is unreliable and touch is not. Look at your hands under a headlamp if you are unsure whether what you are feeling is blood or water.
Finally, put a hand on their skin. Cold, pale, and damp skin on someone who has been injured is not just discomfort. It is one of the earliest signs that they are losing blood faster than their body can cope with, and it should change your urgency immediately.
The screaming casualty is not your priority
A person who can scream can breathe. In a multiple casualty scene, check the silent ones first. Noise is reassuring; silence is not.
Stopping serious bleeding
Serious bleeding is first in the sequence because it is the fastest killer you can actually do something about. An adult carries roughly 10 to 12 pints (5 to 6 L) of blood. Losing about 2 pints (1 L) produces obvious distress; losing about 4 pints (2 L) drops most people into severe, life-threatening shock. A major arterial wound can move that much in a few minutes.
Tell the two kinds apart. Bright red blood that pulses or spurts in time with the heartbeat is arterial and is the emergency. Darker blood that wells steadily out of a wound is venous, slower, and usually controllable, though a large vein still bleeds enough to matter. Steady oozing from a scrape is not in this category at all and can wait until the end.
Direct pressure, done properly
Direct pressure controls the large majority of bleeding, including a surprising amount of arterial bleeding, and almost everyone does it too gently and for too short a time. The technique is not a dressing laid on a wound. It is your body weight, driven through the heel of one hand or two stacked hands, onto the exact point the blood is coming from, hard enough to hurt, and held without interruption.
Get the cleanest cloth you have between your hand and the wound, or nothing at all if that is the choice. Push. Then keep pushing for a full ten minutes by the clock, not by feel, because your sense of elapsed time under stress is badly compressed and most people quit at ninety seconds convinced it has been five minutes.
Do not lift the dressing to check. A forming clot is fragile and peeling the gauze off tears it away and restarts the bleed. If blood soaks through, add material on top and increase the pressure. If you must swap position because your arms are failing, have the second person’s hands in place before yours come off.
Elevating a bleeding limb above the heart is a reasonable extra if you can do it without causing pain or moving a possible fracture, but it is a supplement to pressure and never a substitute for it.
Then dress it
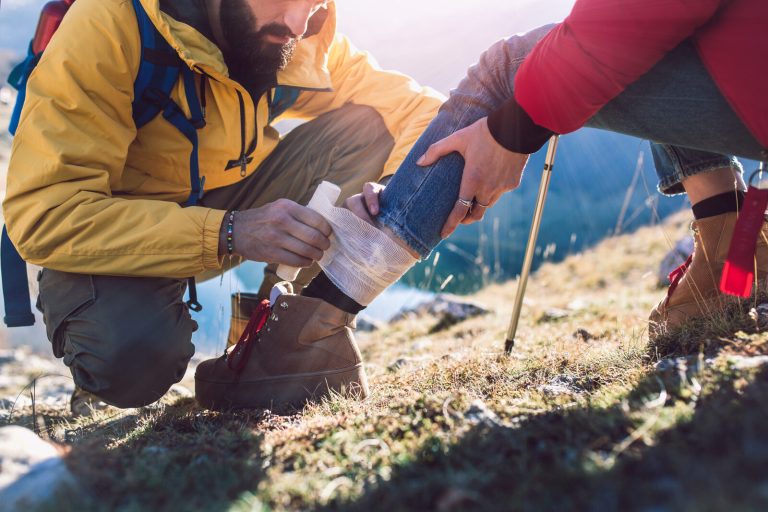
Once bleeding is controlled, keep it controlled. A pressure bandage wrapped firmly over the dressing frees your hands and holds what you achieved. Wrap snugly enough to maintain pressure but not so tight that you cannot slide a finger under the wrap, and check fingers or toes below the wrap every fifteen minutes for warmth, colour, and sensation. Cleaning and closing the wound comes much later, and our guide to wound care in the backcountry covers that part properly.
When pressure is not enough
Some wounds are too deep or too fast for a hand on the outside. There are two answers, and which one you use depends entirely on where the wound is.
Packing a deep wound
For a deep wound in the groin, armpit, neck, buttock, or shoulder, a tourniquet cannot be placed above it. These are the junctions, and they are where packing is the technique. Find the actual bleeding point inside the wound, wiping pooled blood aside so you can see it. Then feed gauze into the cavity, pressing it down onto the source, and keep feeding until the wound is packed tight and the gauze is mounded above skin level. Then apply hard direct pressure through the packing for at least three minutes, and longer if you have hemostatic gauze that specifies more.
Plain rolled gauze works by filling the space and letting you press on the vessel from inside. Hemostatic gauze adds a clotting agent that speeds the process, and it is worth carrying if your trips take you a long way from a road. Do not pack an open chest or abdominal wound, and do not pack an eye socket or a skull wound.
Tourniquets
A tourniquet on an arm or a leg is the correct answer to life-threatening limb bleeding that pressure will not stop. The old fear that a tourniquet costs the limb has not held up: modern practice is that a properly applied tourniquet left in place for up to about two hours is very unlikely to cause lasting harm, and hesitating has killed far more people than tourniquets have maimed.
Place it 2 to 3 inches (5 to 8 cm) above the wound, between the wound and the heart, never directly over a joint and never on the wound itself. If you cannot see where the bleeding is coming from, if the light is bad, or if the limb is a mess, put it high on the limb near the armpit or groin instead and sort it out later. Tighten until the bleeding stops, which is usually well past the point where the casualty objects, and expect it to hurt.
Write the time of application somewhere it will not be lost. On the tourniquet’s own tab, or on the casualty’s forehead in permanent marker, which sounds crude and is standard in military casualty care, where a T and the time go on the forehead so every rescuer after you sees it. Do not cover the tourniquet with a blanket or clothing, and do not loosen it to “let blood back in.” Once it is on, it stays on until someone with more training and better equipment takes it off.
A belt or a bandana twisted with a stick is a poor tourniquet. Improvised versions are hard to tighten enough to stop arterial flow and frequently loosen after appearing to work, and a narrow cord or strap does damage without doing the job. If you carry one purpose-built item beyond a standard kit, make it a real windlass tourniquet.
Do not wait to see if it slows down
Arterial bleeding that soaks a dressing in under a minute, pools on the ground, or spurts with the pulse needs a tourniquet now, not after another attempt at pressure. Minutes matter here in a way they do not anywhere else in this article.
Shock, and why it kills quietly
Shock is not fright or emotional upset. It is circulatory failure: not enough blood reaching the tissues to keep them alive. Its most common backcountry cause is blood loss, which may be internal and invisible, but it also follows crush injuries, major fractures, severe burns, deep hypothermia, and anaphylaxis.
The dangerous thing about shock is that the body hides it. A healthy adult can lose 15 percent of their blood volume with almost no visible change, and up to 30 percent while maintaining a normal blood pressure by squeezing down the vessels and speeding up the heart. That compensation is why a casualty can look and sound fine, then deteriorate suddenly and steeply. By the time blood pressure drops, the reserve is spent.
So watch the early signs rather than waiting for the obvious ones. Skin that is pale, cool, and clammy. A fast, weak, thready pulse. Rapid shallow breathing. Thirst, often intense. Nausea. Restlessness and anxiety that seems out of proportion, or a person who becomes irritable, then vague, then quiet. That progression, from agitated to sleepy, is a person getting worse, not calming down.
What to do
Stop the bleeding. That is the treatment. Everything below is support while you do it, or while you wait.
Lay the person flat on their back and get them off the ground onto a pad, a pack, spare clothing, anything that breaks contact with cold earth. Insulate above and below. Loosen tight clothing. Keep them still, because movement raises oxygen demand they cannot meet. Talk to them and keep talking, since calm reduces oxygen consumption and fear does the opposite.
Positioning depends on the cause. For an injured person, keep them flat and do not raise the legs: lifting them moves a possible fracture of the leg, pelvis or spine, and the improvement it gives lasts only minutes when help is hours away. For shock without injury, such as fainting, heat exhaustion, dehydration or a severe allergic reaction, lay the person flat and raise their feet 6 to 12 inches (15 to 30 cm) on a pack. If they are having trouble breathing, let them sit up instead.
Do not give food or drink to anyone who is drowsy, confused, vomiting, or has an abdominal injury. Small sips of water are reasonable for a fully alert casualty who is a long way from help, but a person in true shock needs fluid in a vein, not a stomach.
Then monitor, and write it down. Level of alertness, pulse, breathing rate, and skin condition, every fifteen minutes, on paper or on a phone. A single reading tells you very little. A trend across an hour tells you almost everything, and it is the first thing a rescue team will ask for.
Keeping a hurt person warm
Warmth belongs in the life threat list, not in the comfort list, and this is the step outdoor groups skip most often.
An injured person loses heat much faster than a healthy one. They are lying still on cold ground, often wet, usually in shock, frequently with the shivering response blunted by blood loss. People become hypothermic during rescues at 50°F (10°C) on a summer afternoon, because the mechanism is contact with cold ground plus wind plus time, not extreme air temperature.
It matters more than discomfort explains. A cold trauma casualty stops clotting properly, which restarts the bleeding you just controlled, which worsens the shock, which makes them colder still. Trauma medicine calls this loop the lethal triad, and the practical point for you is simple: insulating a bleeding casualty is not aftercare, it is part of the bleeding control.
Get a barrier under them first, since the ground steals heat faster than the air does. Then remove wet clothing if you can do it without moving them much, add dry insulation, and wrap the whole package including the head in something windproof and waterproof. A group shelter or bothy bag over the top of everyone is even better, because it also keeps the rescuers functional. Our full guide to recognizing and treating hypothermia covers the staging, the rewarming, and how to build a proper hypothermia wrap, and frostbite, frostnip, and trench foot covers the localized cold injuries that come with a long wait in the cold.
Insulate before you think you need to
By the time a casualty is shivering hard, you are already behind. Get them off the ground and wrapped as soon as bleeding is controlled, in any weather, at any temperature, on every trip. It costs you two minutes and it is the intervention groups regret skipping.
The unresponsive casualty
If a person does not answer you, the priority shifts to the airway. Tap their shoulders and shout. If there is no response, look at the chest for ten seconds and listen at the mouth. Normal breathing is obvious. Occasional gasping is not breathing, and it fools people badly.
If they are breathing but unresponsive, the airway is the whole job. An unconscious person on their back can be suffocated by their own tongue or by vomit. Tilt the head back gently and lift the chin, which lifts the tongue clear, and then put them on their side in the recovery position so anything that comes up drains out. If you suspect a neck injury, the airway still wins: a person with a protected spine and no airway dies, and the modern approach is to open the airway while limiting movement rather than to leave it closed.
If they are not breathing, start chest compressions. Push hard and fast in the centre of the chest, about 2 inches (5 cm) deep, at 100 to 120 compressions a minute, and let the chest come all the way back up between each one. If you have training and are willing, add two rescue breaths after every 30 compressions.
You should also know the honest context. In a remote setting, with no defibrillator and no chance of one arriving within minutes, CPR for a cardiac arrest caused by a heart problem almost never works. Wilderness medicine accepts a small number of exceptions where prolonged effort genuinely does save people: drowning, lightning strike, avalanche burial, and deep hypothermia. In those cases keep going, because the physiology is different and there are well documented survivals after long resuscitations. A severely hypothermic casualty can look dead, with no detectable pulse and fixed pupils, and still recover, which is where the maxim “not dead until warm and dead” comes from.
Guidance also exists for stopping, and it is worth knowing so the decision does not fall on you unprepared. Resuscitation is not started for injuries that are obviously unsurvivable, and for a cardiac arrest caused by trauma, ten minutes of CPR without any sign of life is generally accepted as the end of it. Nobody will fault a group that stops in that situation, and continuing indefinitely puts the rest of the party at risk in bad weather or difficult terrain.
Head, neck, and back
Suspect a spinal injury whenever the mechanism could produce one: a fall from any real height, a hard blow to the head, a tumbling fall down a slope, a diving or swiftwater impact, or a collision with a tree or rock at speed.
Wilderness practice has moved away from strapping people to backboards, which cause their own harm on long carries and were never shown to improve outcomes. The goal now is protecting the spinal cord, not immobilizing the spine as an end in itself. What that means for you is keeping the head, neck, and trunk moving together as one unit when you must move someone, and otherwise leaving them where they are and keeping them comfortable and warm.
You can also often rule it out. A casualty can reasonably be treated as having no spinal injury if all of the following hold: they are fully alert and oriented, they are not intoxicated, they have no pain or tenderness anywhere along the spine when you press gently down its length, they have normal strength and normal sensation in all four limbs, and they have no other injury painful enough to mask spinal pain. If all five are true, the risk is low. If any one of them is false, treat the spine as injured.
For a head injury, the thing to watch is change over time. Someone who was knocked out briefly and now seems fine can still deteriorate over the following hours. Repeated vomiting, worsening headache, one pupil larger than the other, confusion that is getting worse, seizures, clear fluid from the nose or ears, or increasing sleepiness all mean evacuate now. A casualty with a head injury should never be left to sleep unmonitored on the assumption that rest will help.
The problems that actually end trips
Life threats are rare. Trip-ending injuries are common, and the difference between an inconvenience and an evacuation is usually how early you dealt with it.
Wounds get infected in the backcountry because they are dirty and because people are tired. Irrigate every wound that breaks the skin, dress it, and look at it every day, and see wound care in the backcountry for cleaning, closing, and recognizing infection early. Sprains, fractures, and dislocations need to be stabilized before you move anyone, and how to splint covers building one from what you have.
Blisters deserve more respect than they get, because they end more trips than any dramatic injury. A hot spot is the warning and it is trivial to fix; a burst blister on day two of a five day trip is an open wound in a boot. Stop and tape at the first hint of rubbing, even though you do not want to.
The rest of the common backcountry medical problems have their own guides: heat exhaustion and heat stroke, bites and stings, poison ivy, oak, sumac, and hogweed, and altitude sickness, whose early symptoms look like an ordinary bad day and whose severe forms kill within hours. Hygiene belongs on this list too, since a group hit by a stomach bug at a remote camp has a genuine emergency on its hands and the cause is nearly always hands.
Stay or go: the evacuation decision
Once the immediate threats are handled, you face the decision that experienced parties get wrong most often. Do you walk out, carry out, or stay put and call?
Some situations are not decisions at all. Any of these means summon help and do not attempt to self-evacuate: unconsciousness or any altered mental state, difficulty breathing, a tourniquet in place, suspected spinal or serious head injury, an open fracture, a broken thigh, pelvis or lower leg, any fracture with numbness or poor circulation beyond it, a large burn, a snakebite with spreading symptoms, chest pain, an anaphylactic reaction, or a casualty who is deteriorating rather than stabilizing.
Walking someone out is only reasonable when they are alert, stable, and can genuinely move under their own power without making the injury worse, and when the terrain and remaining daylight support it. Be honest about the arithmetic. An injured person moves at a fraction of their normal pace, and a party that would normally cover 3 miles (5 km) in an hour may take four hours to do it. A carry is harder still: hand-carrying an adult over rough ground realistically needs six or more people and is exhausting within a few hundred yards (a few hundred metres).
Weigh the cost of staying against the cost of moving. Staying means exposure, a longer wait, and a group that gets cold and tired. Moving means further injury, a possible second casualty, and losing the location you already told someone about. When it is close, staying put with good shelter and a working communicator is usually the better choice, because rescuers can reach a known point far more efficiently than they can find a party that is on the move.
Nighttime is its own factor. Rescue helicopters are limited after dark and in poor weather, and a ground team may take many hours. Plan for a night out whenever the call goes in late in the day, and start building shelter before you need it rather than after.
Calling for help, and what to say
A satellite communicator has changed backcountry medicine more than any piece of first-aid gear, because it converts an unknown multi-day wait into a known one. The Garmin inReach Mini 2 and the SPOT X both allow two-way messaging, which lets you describe the injury and get an answer back, while the ACR ResQLink 400 is a subscription-free beacon that sends a distress signal without conversation. Two-way is worth the subscription for a medical emergency, because “how bad is it” is the first question anyone will ask.
Do not delay the call while you decide whether it is serious enough. Rescue agencies would far rather stand down than start late, and you can always update or cancel. If you have no signal at all, our guide to signaling for rescue covers what still works when the electronics do not.
When you make contact, lead with the things that determine what gets sent. Rescuers are deciding aircraft versus ground team, and how urgently, from your first two sentences.
- Where you are. Coordinates if you have them, plus a plain-language description and the nearest trail or landmark.
- What happened, and when. Mechanism and time of injury.
- How many people are hurt, and the age and sex of each.
- What is wrong. The main injury, whether they are awake and alert, whether they are breathing normally, and whether bleeding is controlled.
- What you have done, including a tourniquet and the time it went on.
- What you have. Shelter, warm layers, food, water, how many people are in the party, and how much daylight is left.
Then keep a written log while you wait: time, alertness, pulse, breathing, skin, and anything that changes. A single set of numbers is nearly useless and a trend is gold. If the casualty is deteriorating, send that update, because it can change the response from a ground team to a helicopter.
All of this works far better if somebody knew your plan in the first place. Leaving a trip plan with a person at home, with your route and your expected return, is the single cheapest safety measure in this article, and our Leave Word tool sends one for you. Trip planning covers the rest.
What to carry
A first-aid kit is not a talisman. Most commercial kits are heavy on adhesive bandages and light on the few items that address a real emergency, and almost nobody opens theirs before the day they need it.
The things that treat life threats are a small list. Gauze, and more than you think, since one serious wound can consume everything a small kit holds. A trauma dressing or an elastic wrap that can hold pressure without your hands. A commercial windlass tourniquet if you travel more than a couple of hours from a road. Gloves. A means of irrigating a wound, which can simply be a clean bag with a pinhole and treated water. Something to write times and numbers on, and a marker. A large trash bag or an emergency bivvy, which is the lightest way to carry the warmth this article keeps asking for and the item most likely to be doing real work while you wait.
Add the personal items nobody else’s kit will have: prescription medications, an epinephrine auto-injector if anyone in the party has a serious allergy, and antihistamines. Tell at least one other person where those live in your pack, because the person who needs them may not be able to point.
If you would rather start from a built kit than assemble one, we have reviewed four that cover the range. The Adventure Medical Ultralight/Watertight .7 is the one we would hand any hiker and the one that stays in our own packs, light and genuinely waterproof. The Surviveware Small is the better first kit if you want everything labelled and findable, which matters more than it sounds when you are working in the dark. The Surviveware Comprehensive steps up to a family, a group, or a multi-day trip, and the My Medic MYFAK Large is the EMT-grade option for guides and trips a long way from help, on the understanding that a kit full of gear you have not been trained on is just weight.
Whichever you buy, open it at home, learn where everything is, and replace what you use. Then add the gauze and the tourniquet, because most hiking kits carry too little of the first and none of the second. A kit you have never opened is a kit you will be searching through in the dark, with bloody hands, while someone waits.
Consider a group shelter as medical equipment rather than camping gear. Getting a casualty and two rescuers under a windproof cover changes the temperature around them within minutes and keeps the helpers working.
Reading is not training
Everything above is useful and none of it is a substitute for putting your hands on the skills. Pressure hard enough to stop an artery feels violent the first time you do it, and you will not do it properly on a real casualty if the first time is a real casualty. The same goes for packing a wound, tightening a tourniquet past the point of protest, and rolling someone onto their side while keeping their spine aligned.
A Stop the Bleed class, about an hour long, covers the bleeding material in this article and is often free. A two-day Wilderness First Aid course adds assessment, evacuation decisions, and the long-duration care that separates backcountry medicine from urban first aid, and it is the right level for most hikers and paddlers. Wilderness First Responder, at around eighty hours, is the standard for guides, trip leaders, and anyone regularly responsible for a group.
Take one with the people you actually travel with. Half of what goes wrong at a real incident is coordination, not technique, and a party that has practised together stops arguing about who is doing what.
Key takeaways
Run the same order every time: scene safe, big bleeding, airway, breathing, warmth, then everything else. Check the quiet casualty before the loud one, and sweep with your hands rather than trusting your eyes to find blood.
For serious bleeding, push hard on the exact spot for ten minutes by the clock and do not peek. Pack deep wounds at the groin, armpit, and neck. Use a real tourniquet without hesitating for limb bleeding that pressure will not stop, place it 2 to 3 inches (5 to 8 cm) above the wound, write down the time, and leave it on.
Treat shock by stopping the bleeding and keeping the person flat, still, insulated, and calm. Watch for cool clammy skin and rising anxiety rather than waiting for dramatic signs, and record vitals every fifteen minutes so you can see a trend. Insulate every injured person from the ground regardless of the weather, because a cold casualty stops clotting.
Call early, give location and mechanism first, and stay put with shelter unless the casualty is genuinely able to walk. Then go take a wilderness first-aid course, because reading this page is preparation and the course is the skill.
Wilderness Experts is reader-supported. As an Amazon Associate we earn from qualifying purchases; when you buy through links on our site we may earn a commission at no extra cost to you. It never changes what we recommend.
Consistent with current bleeding-control guidance from Stop the Bleed and the American College of Surgeons, Wilderness Medical Society clinical practice guidelines for spinal cord protection, accidental hypothermia, and search and rescue medical direction, and standard trauma teaching on hemorrhagic shock. This is general information, not a substitute for hands-on wilderness first-aid training or professional medical care.